A service-based installation without giving a user elevated privileges
Steps
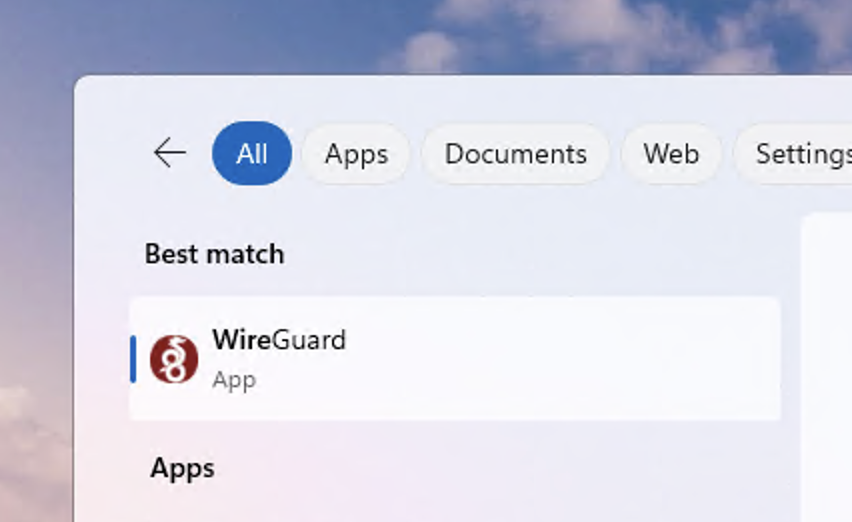
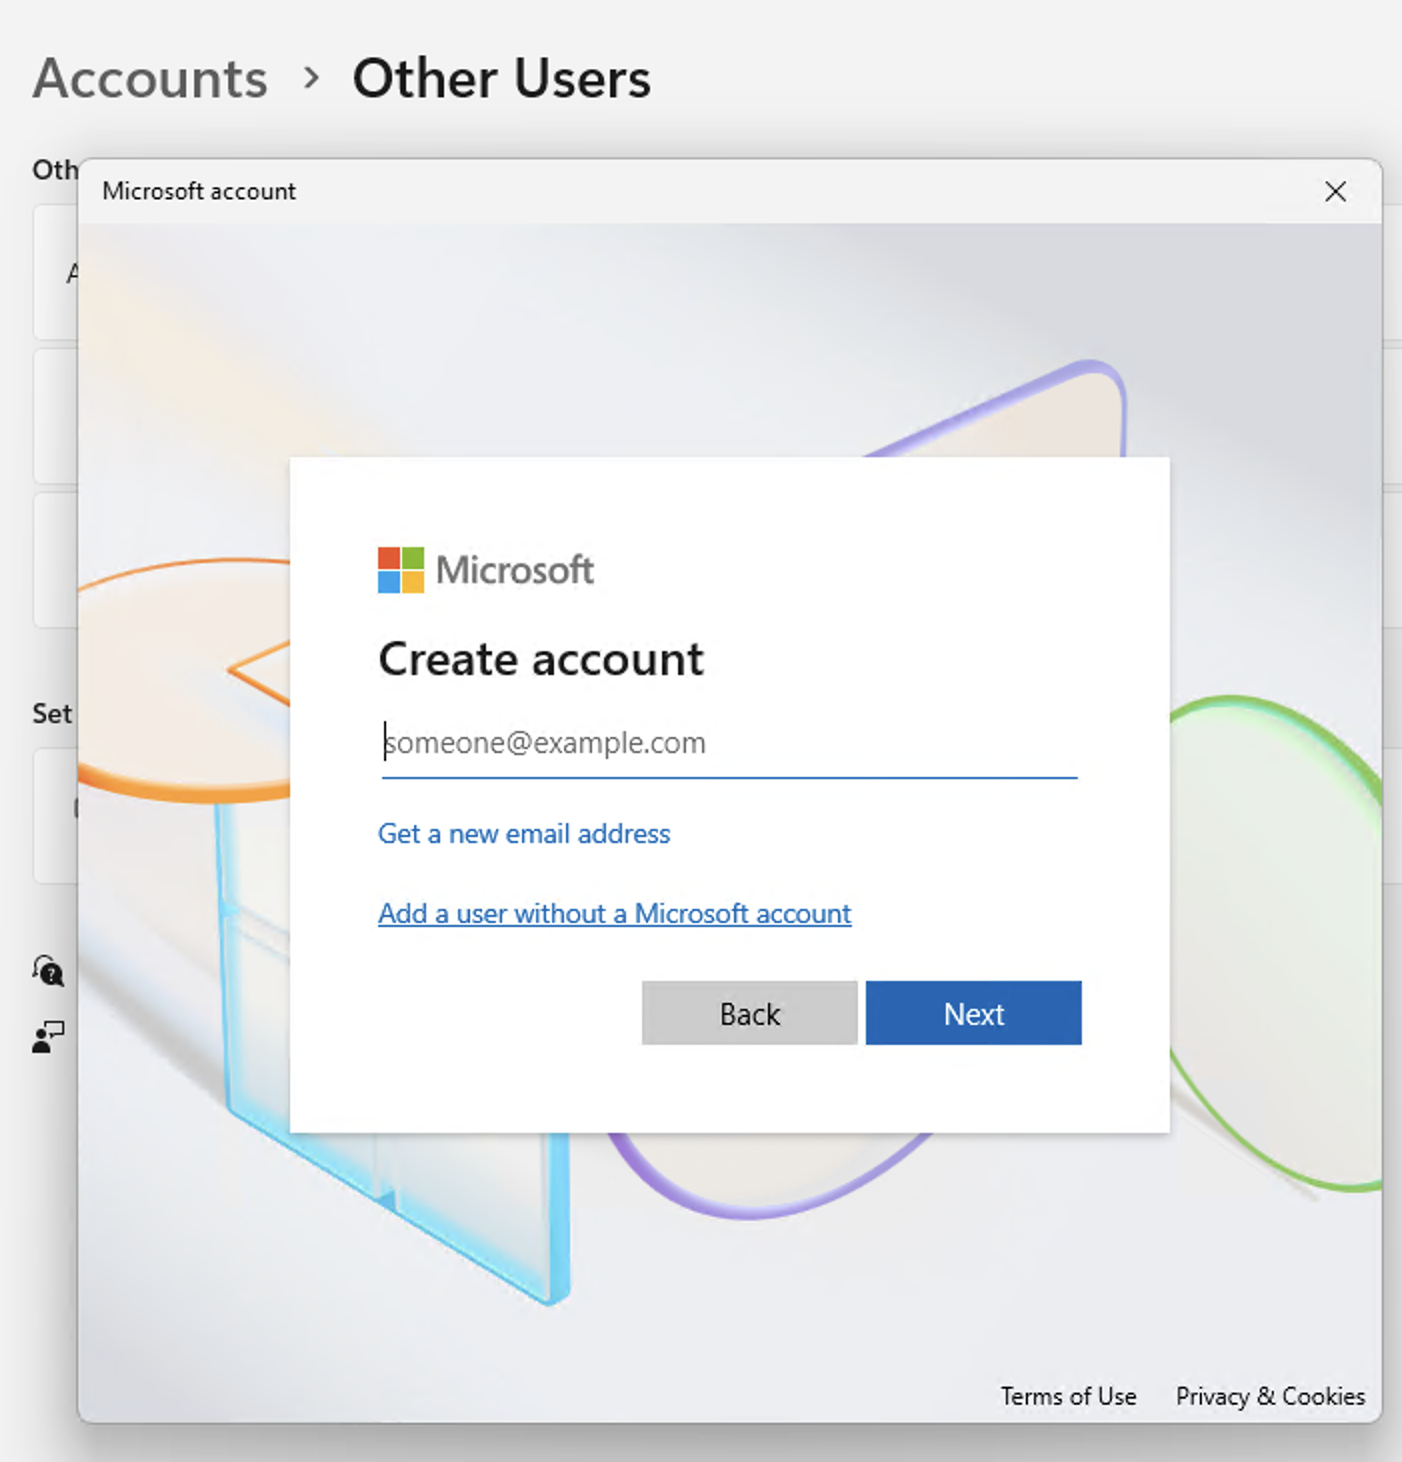
- Download and install the installation file using https://download.wireguard.com/windows-client/
- Install the application using an Administrator account
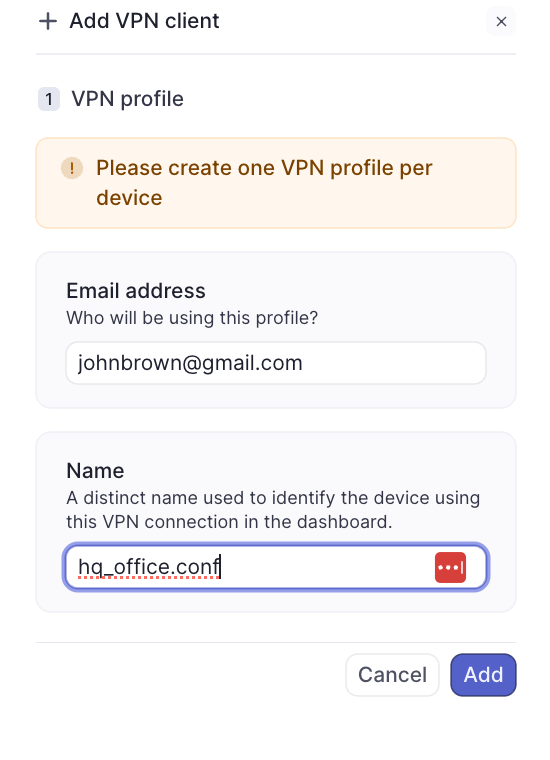
- Go to dashboard.meter.com → Client VPN
- Configure a new client VPN client
- Download the WireGuard configuration file to the user's computer

- Open the Wireguard Application using the Administrator account and upload the new config file to configure the tunnel and upload the downloaded file
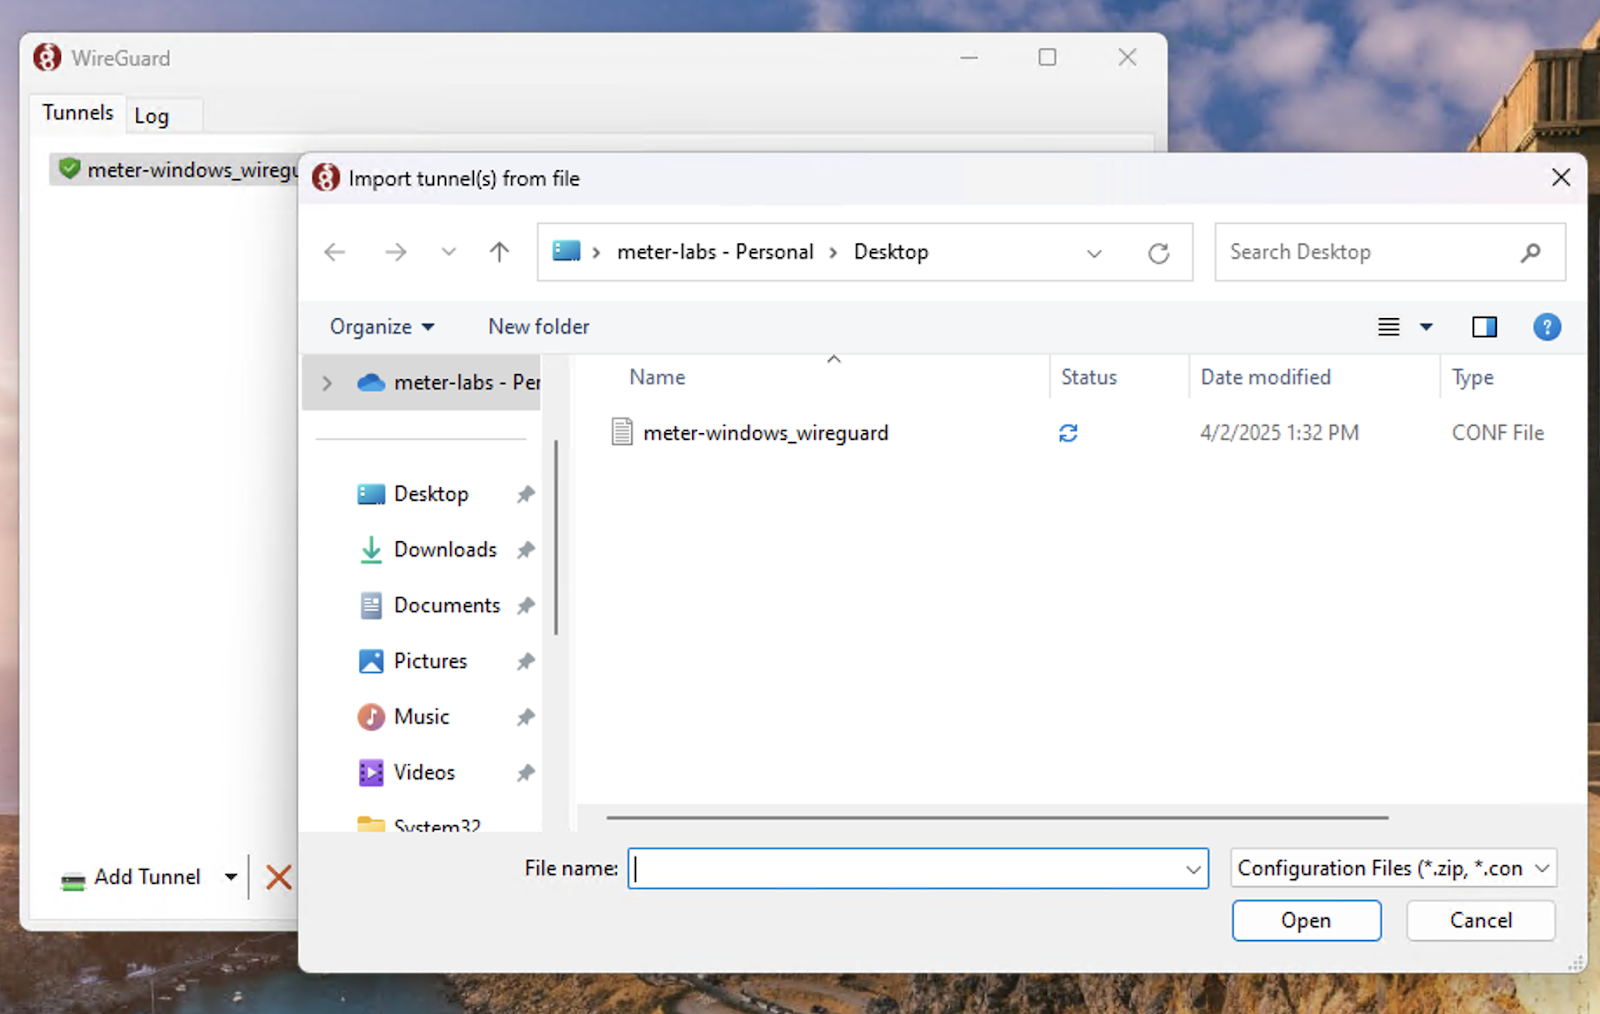
- Press Activate to activate the tunnel
- Once the tunnel is confirmed working with the data transfer usage incrementing for received and sent traffic.

- If the tunnel is up we can now proceed to configure this task to be run automatically in the background when the user logs on.
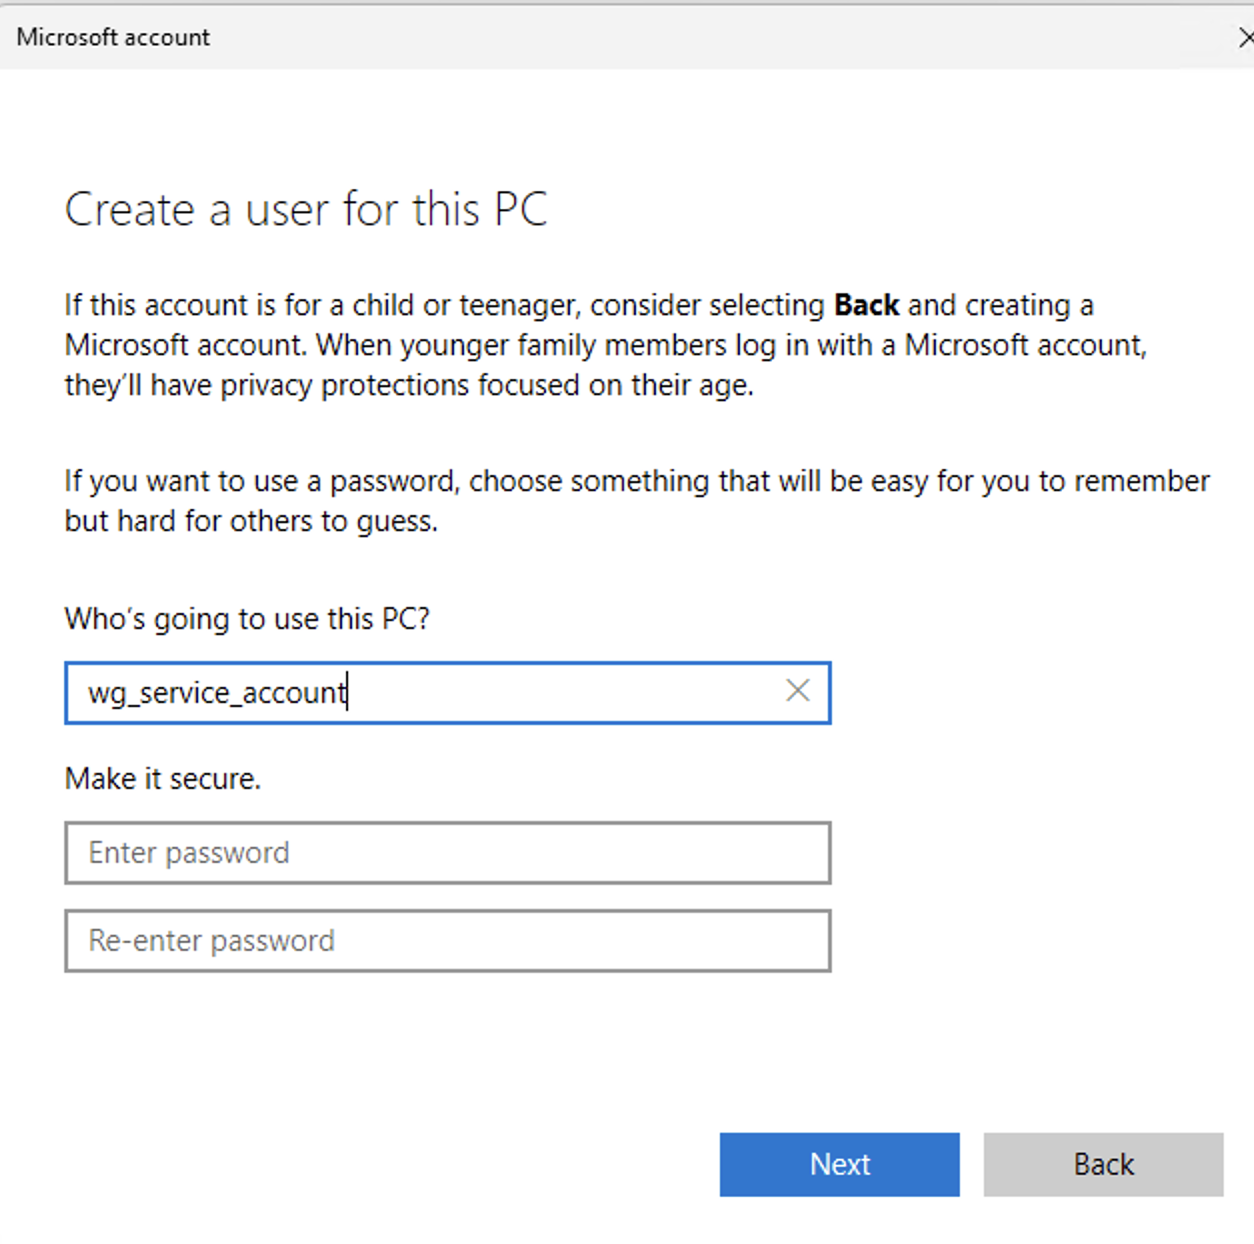
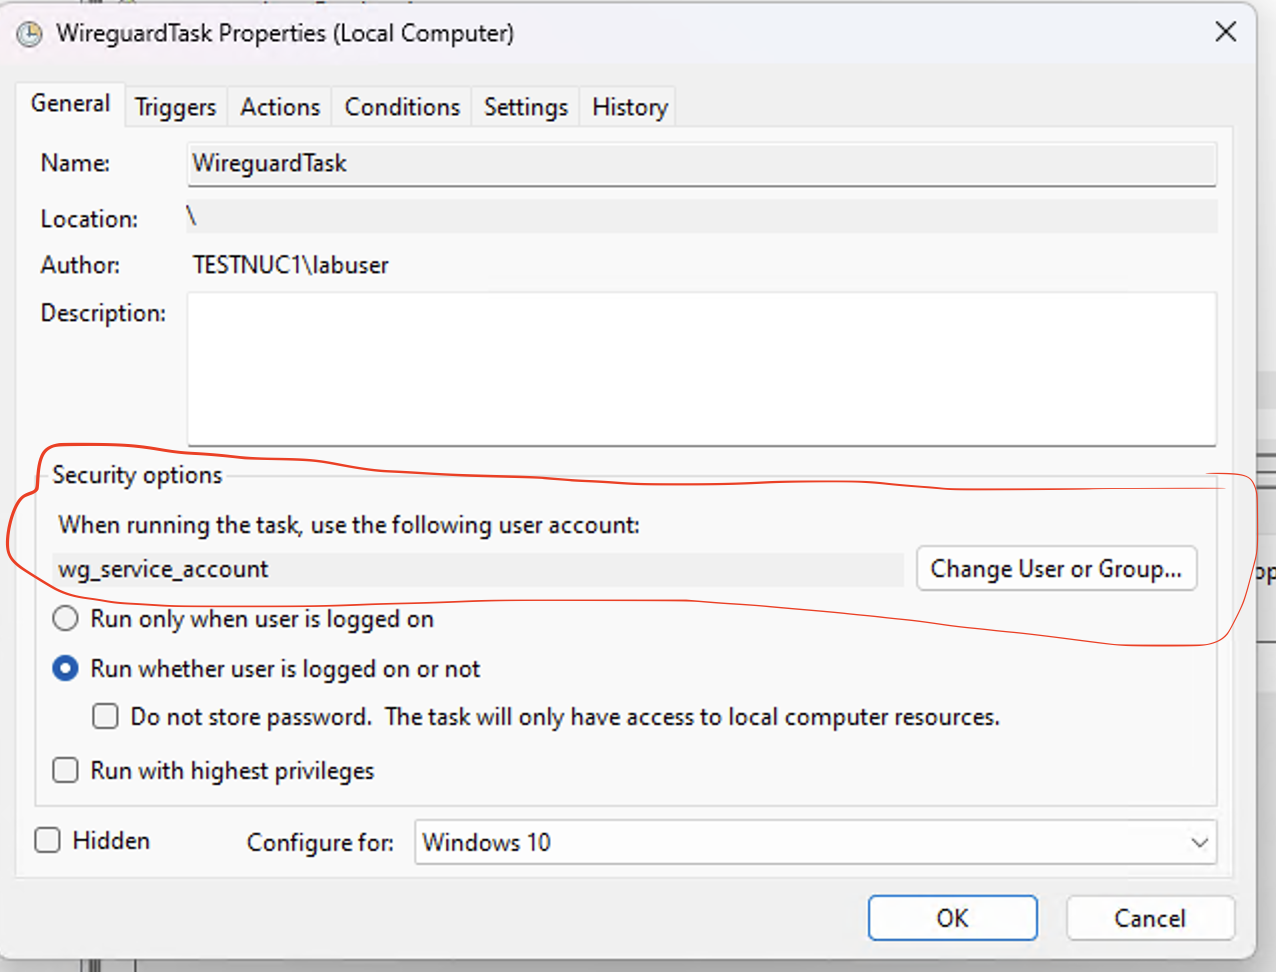
- Create a local service Administrator service account for your preference. Lets use an example user called “wg_service_account”
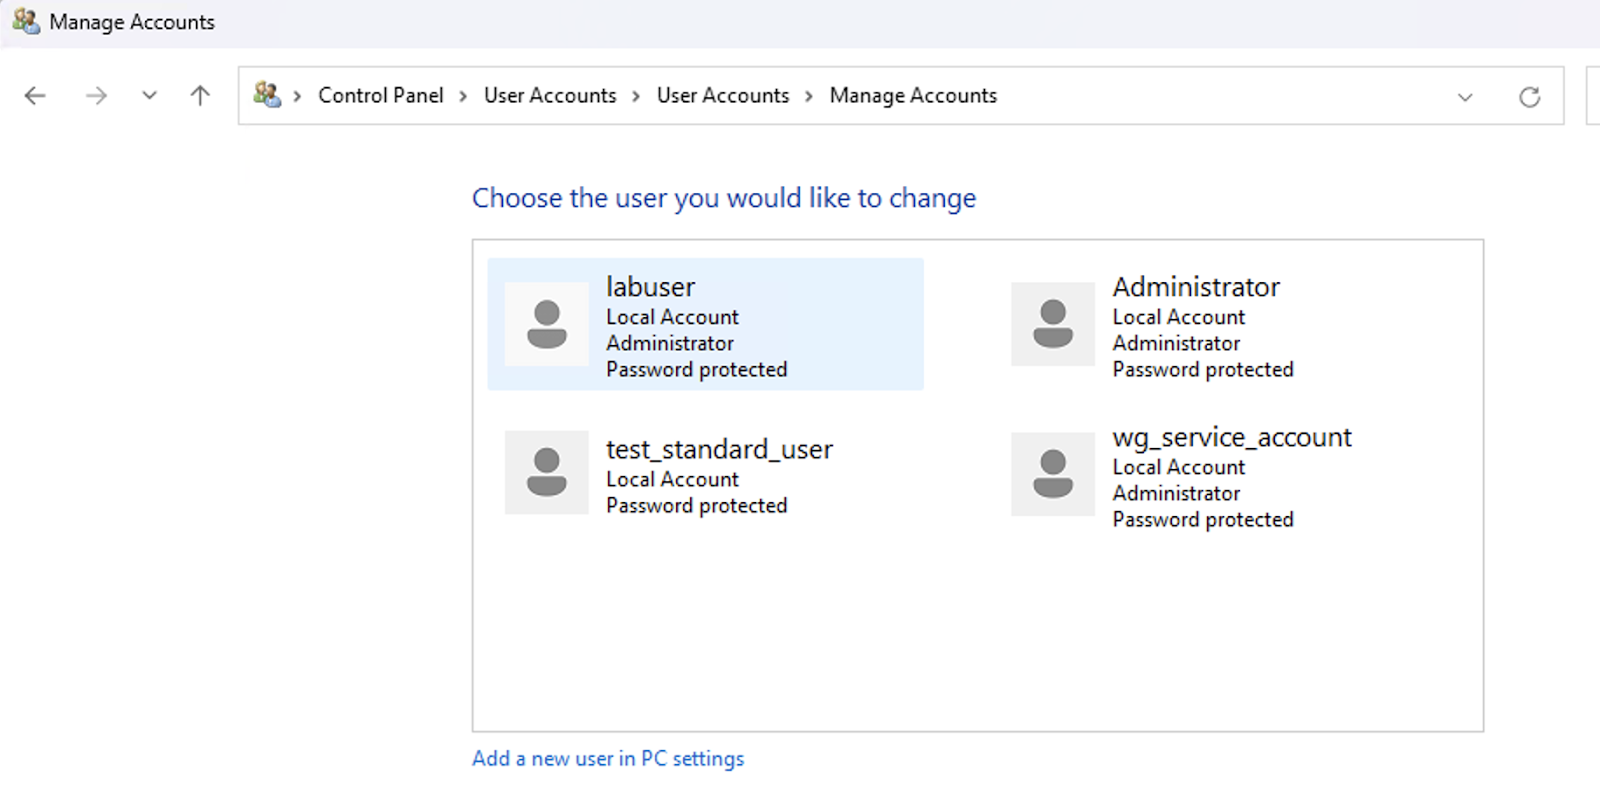

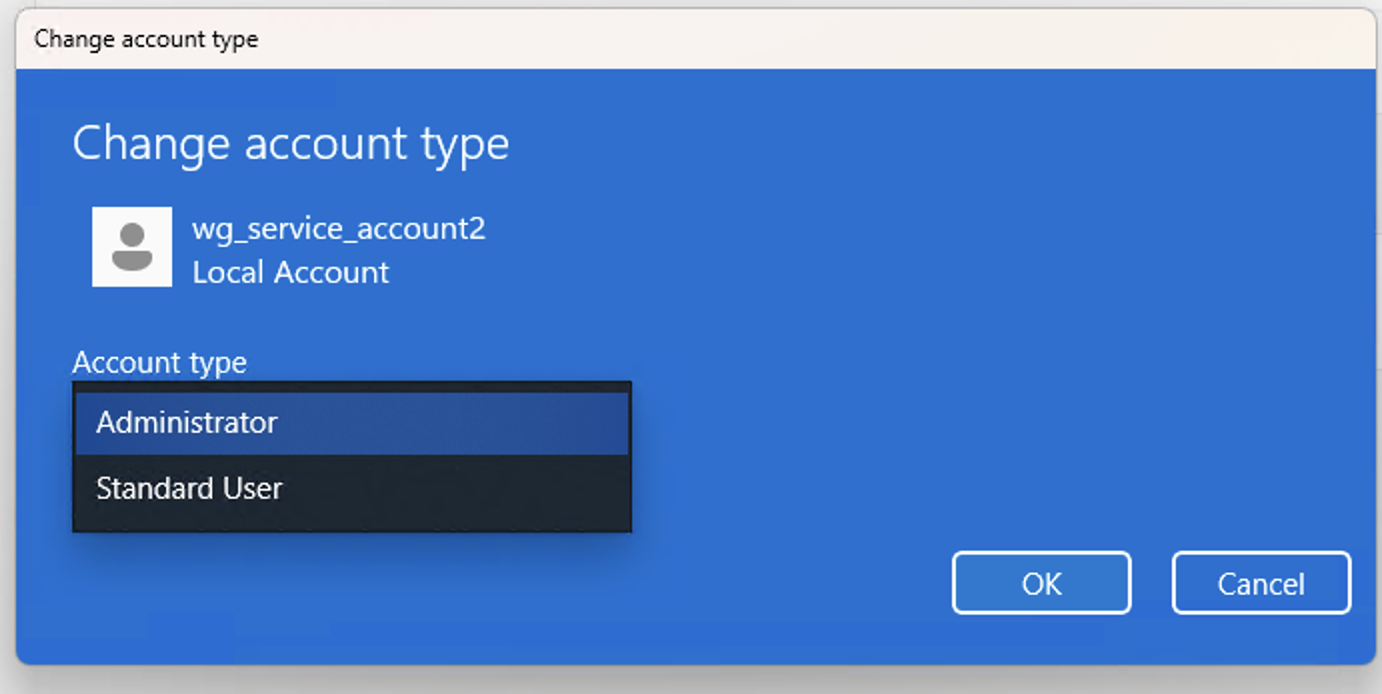
- After creating the account, change the Account type to Administrator. This account will only be used for the Wireguard service and only an Administrator would have access to this or if there are other Service Accounts in your Active directory environment feel free to use that instead.
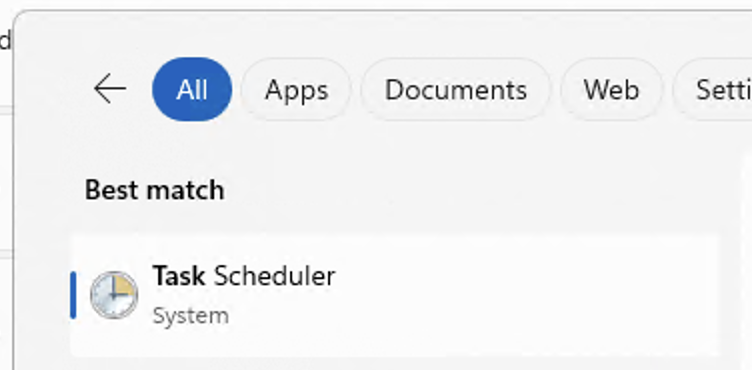
- Configuring the Wireguard Application to run in the background using “Task Scheduler”
If you want the tunnel to auto-connect as soon as the WireGuard app is launched, regardless of user login:
- Press
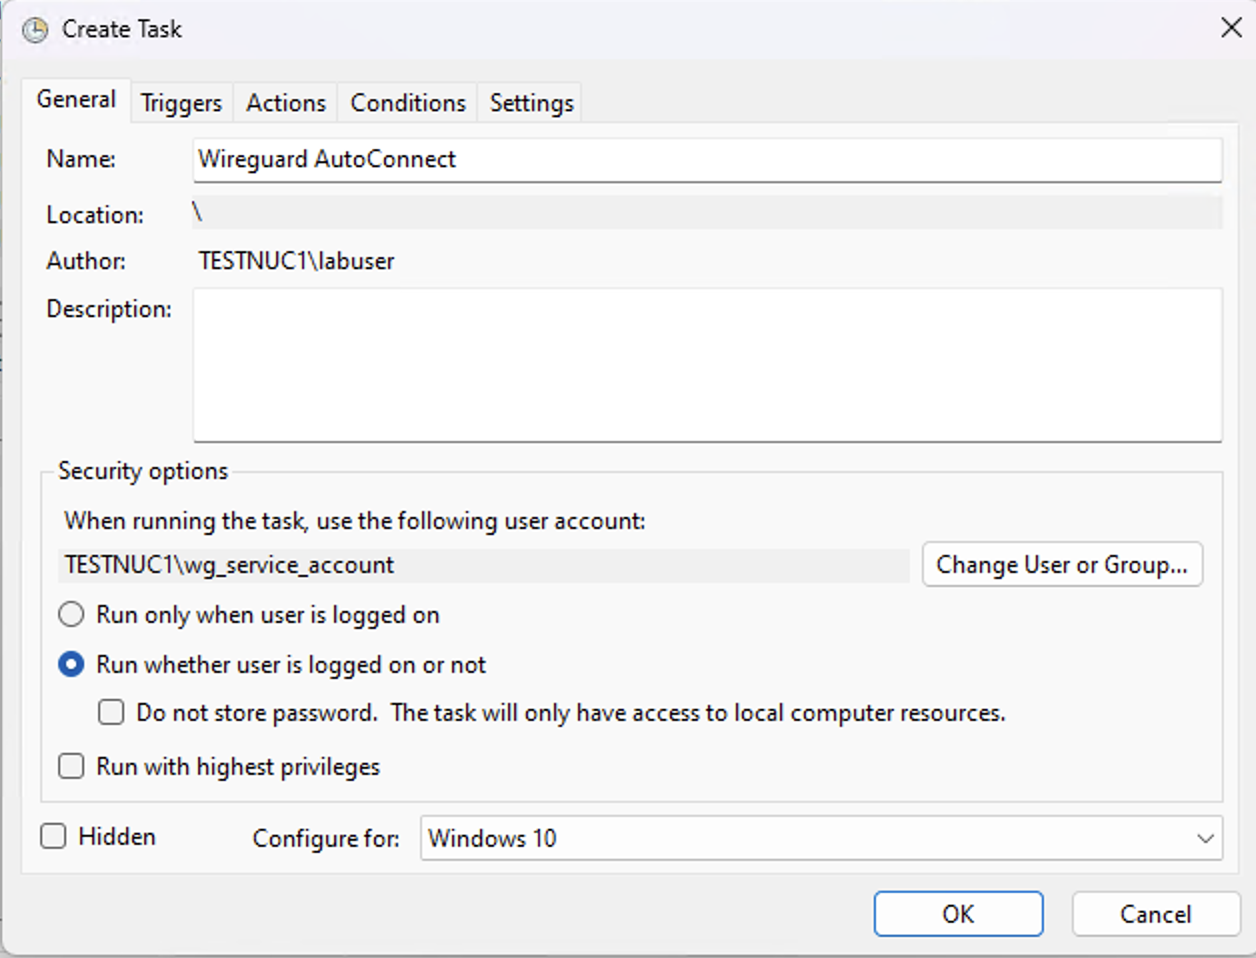
Win + R, typetaskschd.msc, and hit Enter. - In Task Scheduler, click Create Basic Task.
- Name it something like
WireGuard AutoConnect.
In the Security options section, select the Service Account previously created called “wg_service_account” to use when running the task.
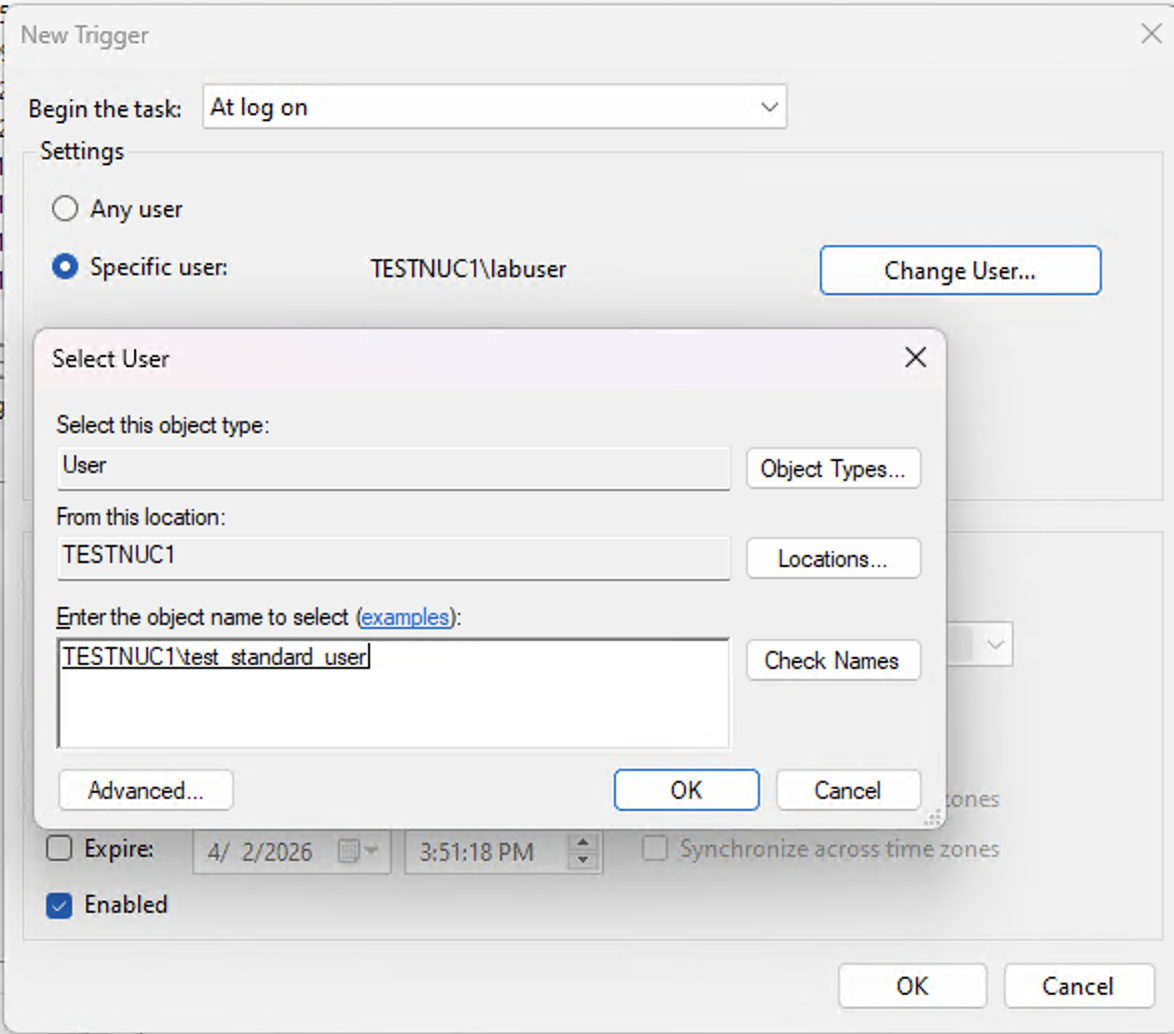
- Create a new Trigger: Choose "When I log on" or "When the application is launched" (advanced step below).

- Action: Choose
Start a program.
Browse to :C:\Program Files\WireGuard\wireguard.exe
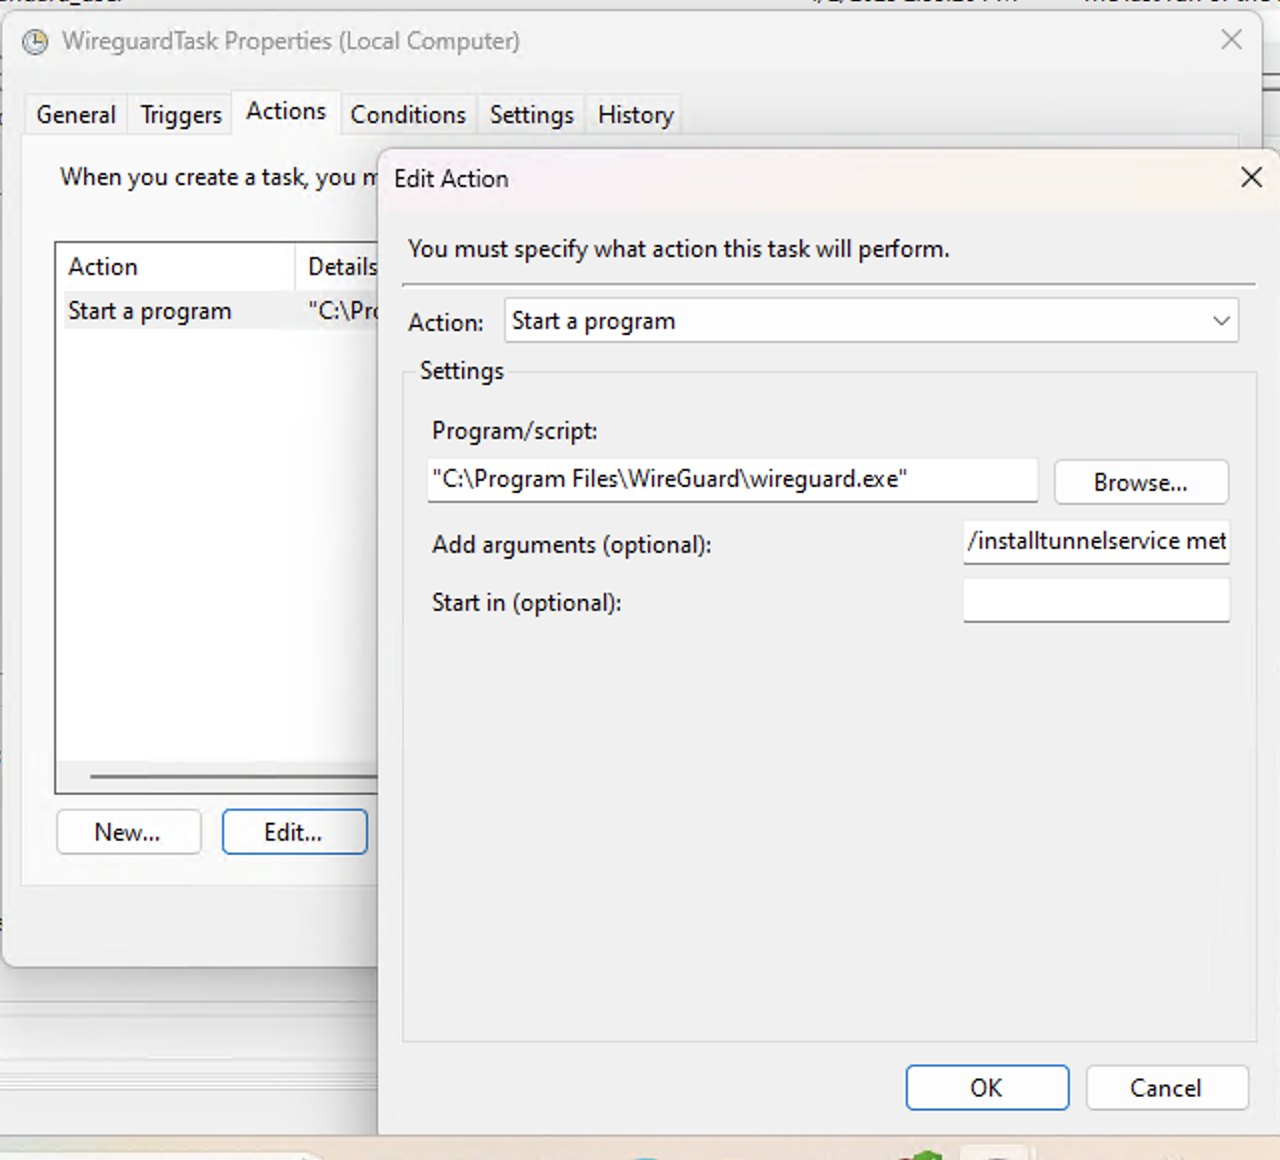
In the Add arguments box, type: /installtunnelservice <tunnel-name>.conf
Replace <tunnel-name> with the name of your .conf file (do not include the full path unless needed). In this case we used hq_office.conf
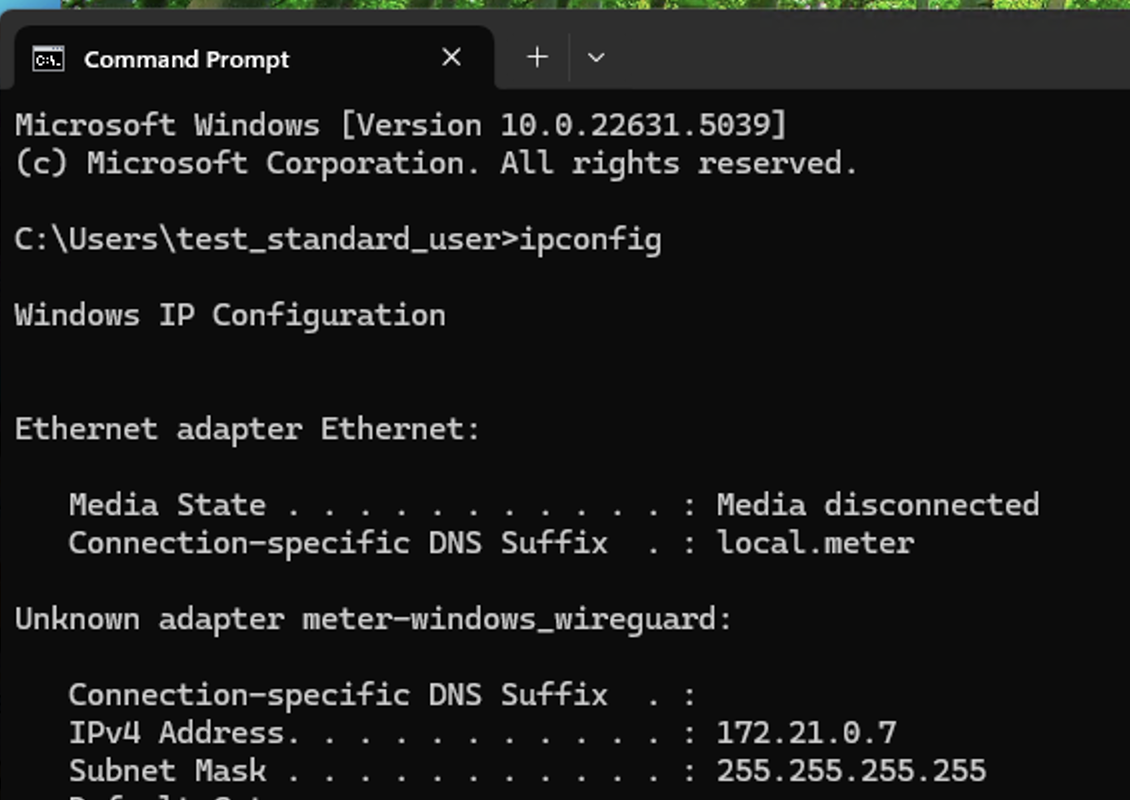
This uses the WireGuard service mode to activate the tunnel as a service. You'll need admin rights.For the other Tabs Conditions and Settings please configure as you see fit for your organisation. 15. Log off the Administrator and login with the standard user that has basic user privileges on the computer.Once logged in with a regular user open the command prompt to check if the tunnel is created in the background, using “ipconfig”
- Validate the connection via pinging or accessing the resources you need to access via the VPN