Who can access this feature?
- Partner
- Company/Network Admins with write and read access
- Meter Support
Overview
To access port information and port settings for your Meter Firewalls, log into the Dashboard and navigate to Hardware > Firewalls > Ports.

Click any Firewall to view the port info specific to that appliance. Toggle Show all to view the port mappings for both Firewalls. The images shown here represent the ports and the layout on the back of the Meter Firewall.
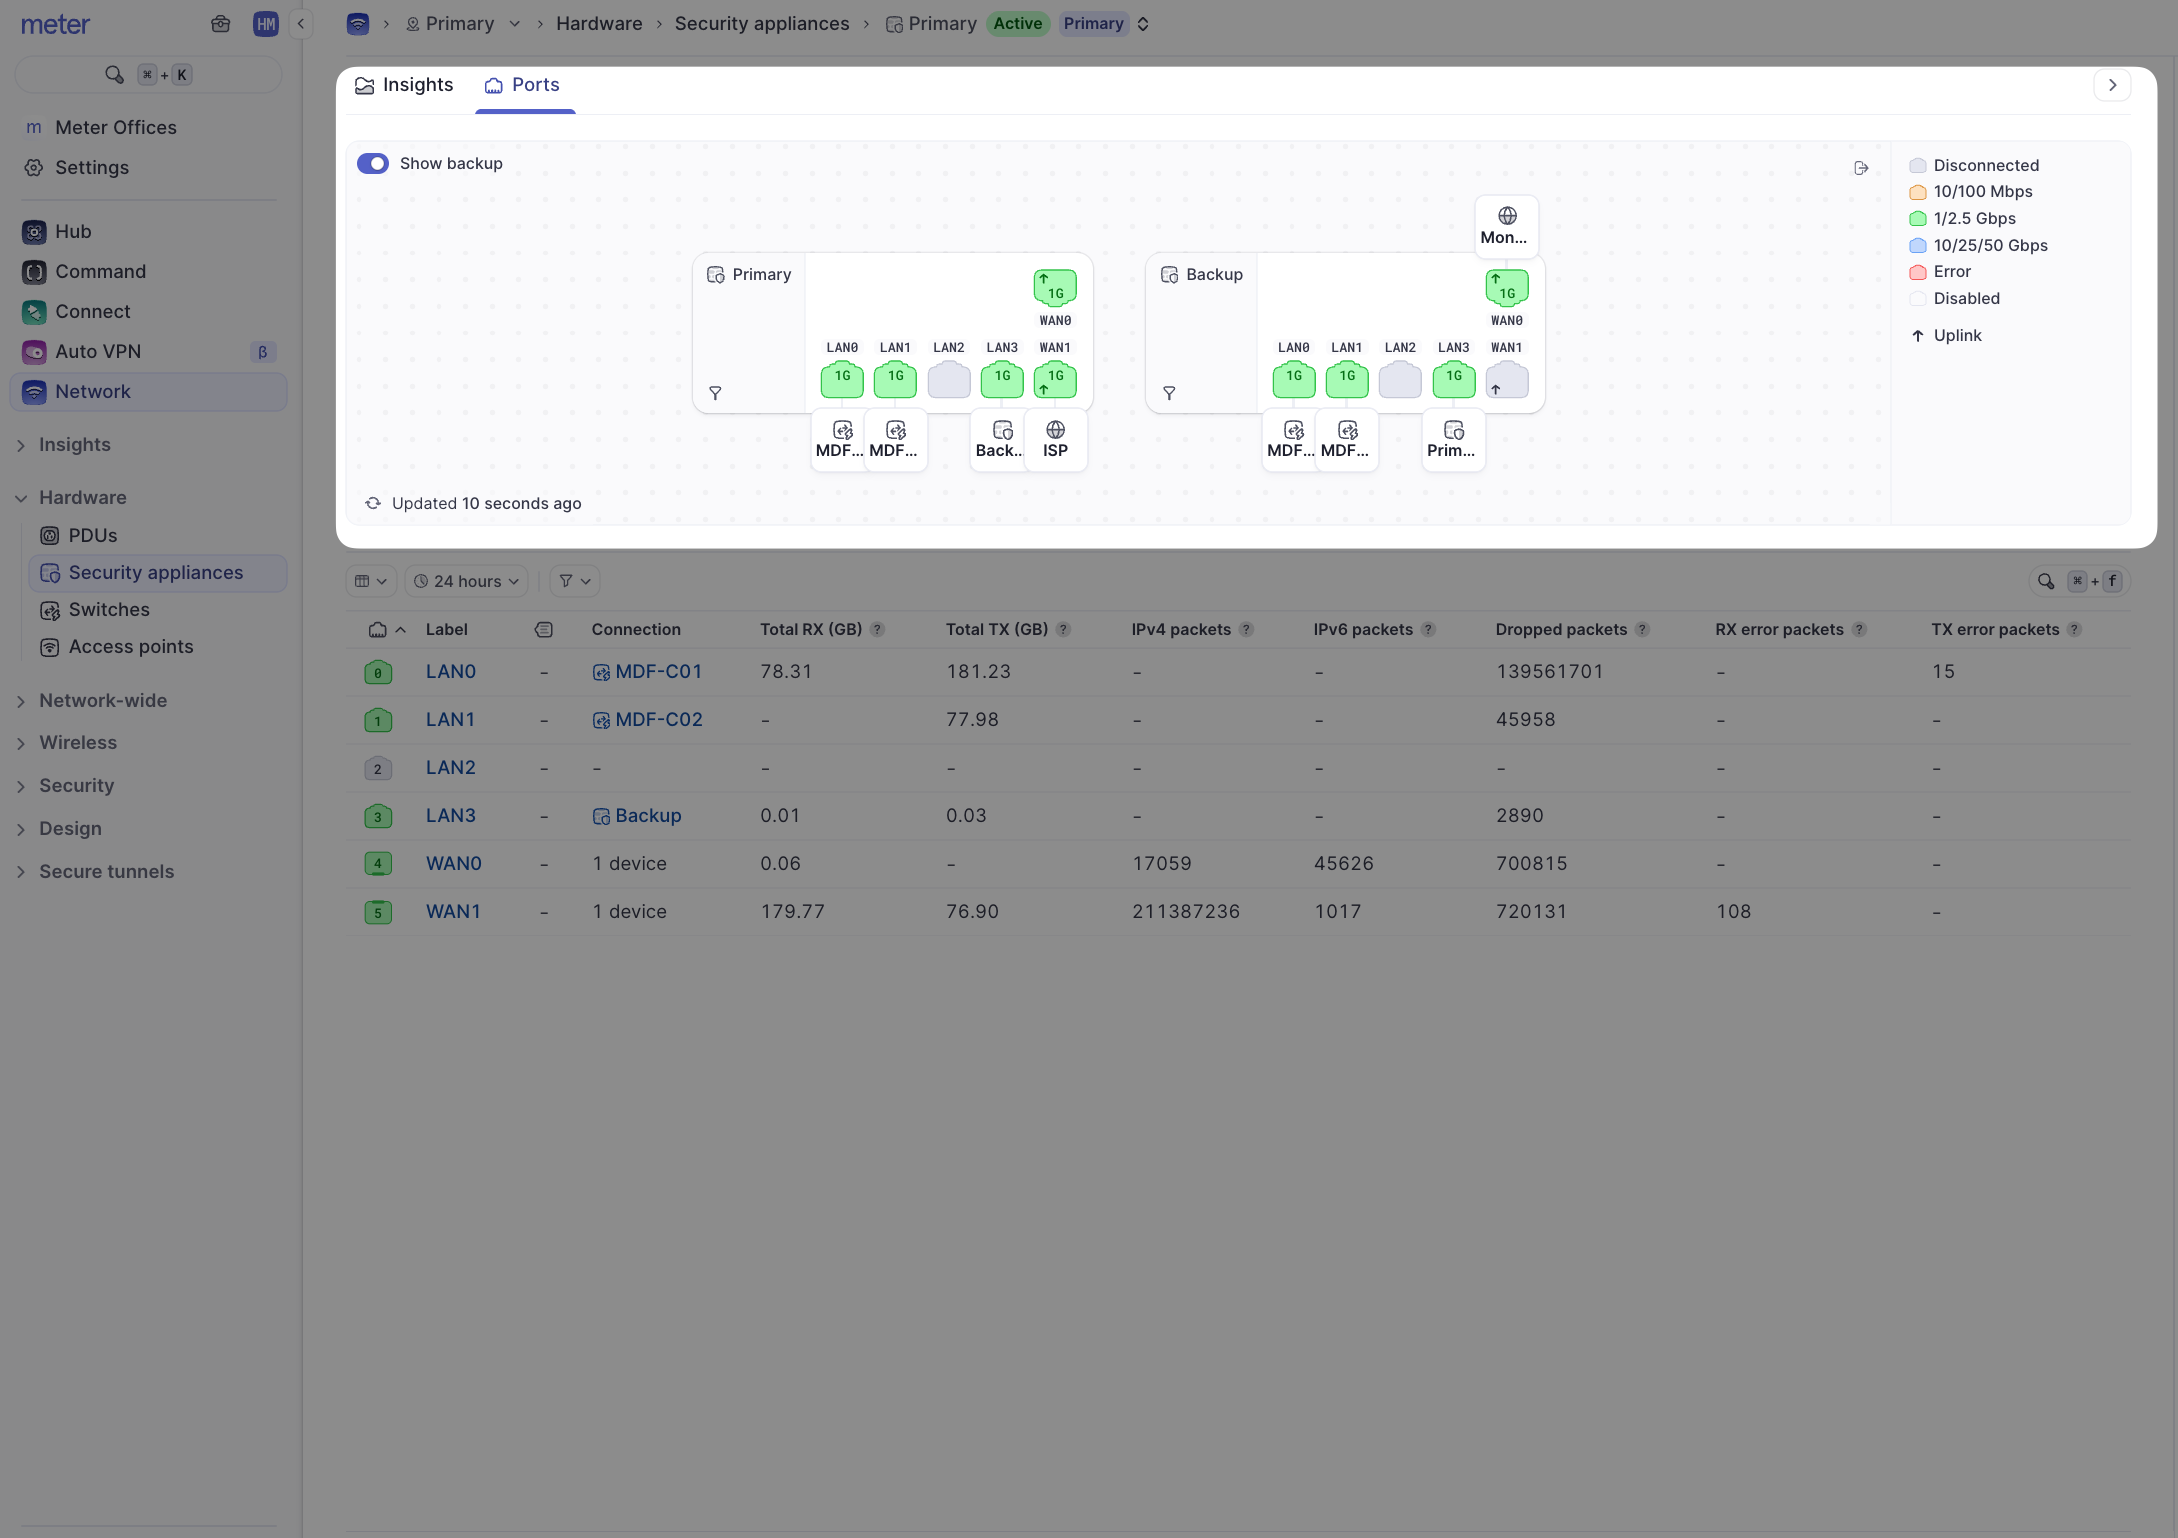
Each port will be color-coded according to the legend to show the link status and port state.

The table below will show usage statistics for each port since the last boot of the selected Firewall. The table displayed here will only show data for your selected Firewall.
Editing a port
To edit a port, click on the port number in the table to expand the menu on the right-hand side of the screen and select the Edit button.
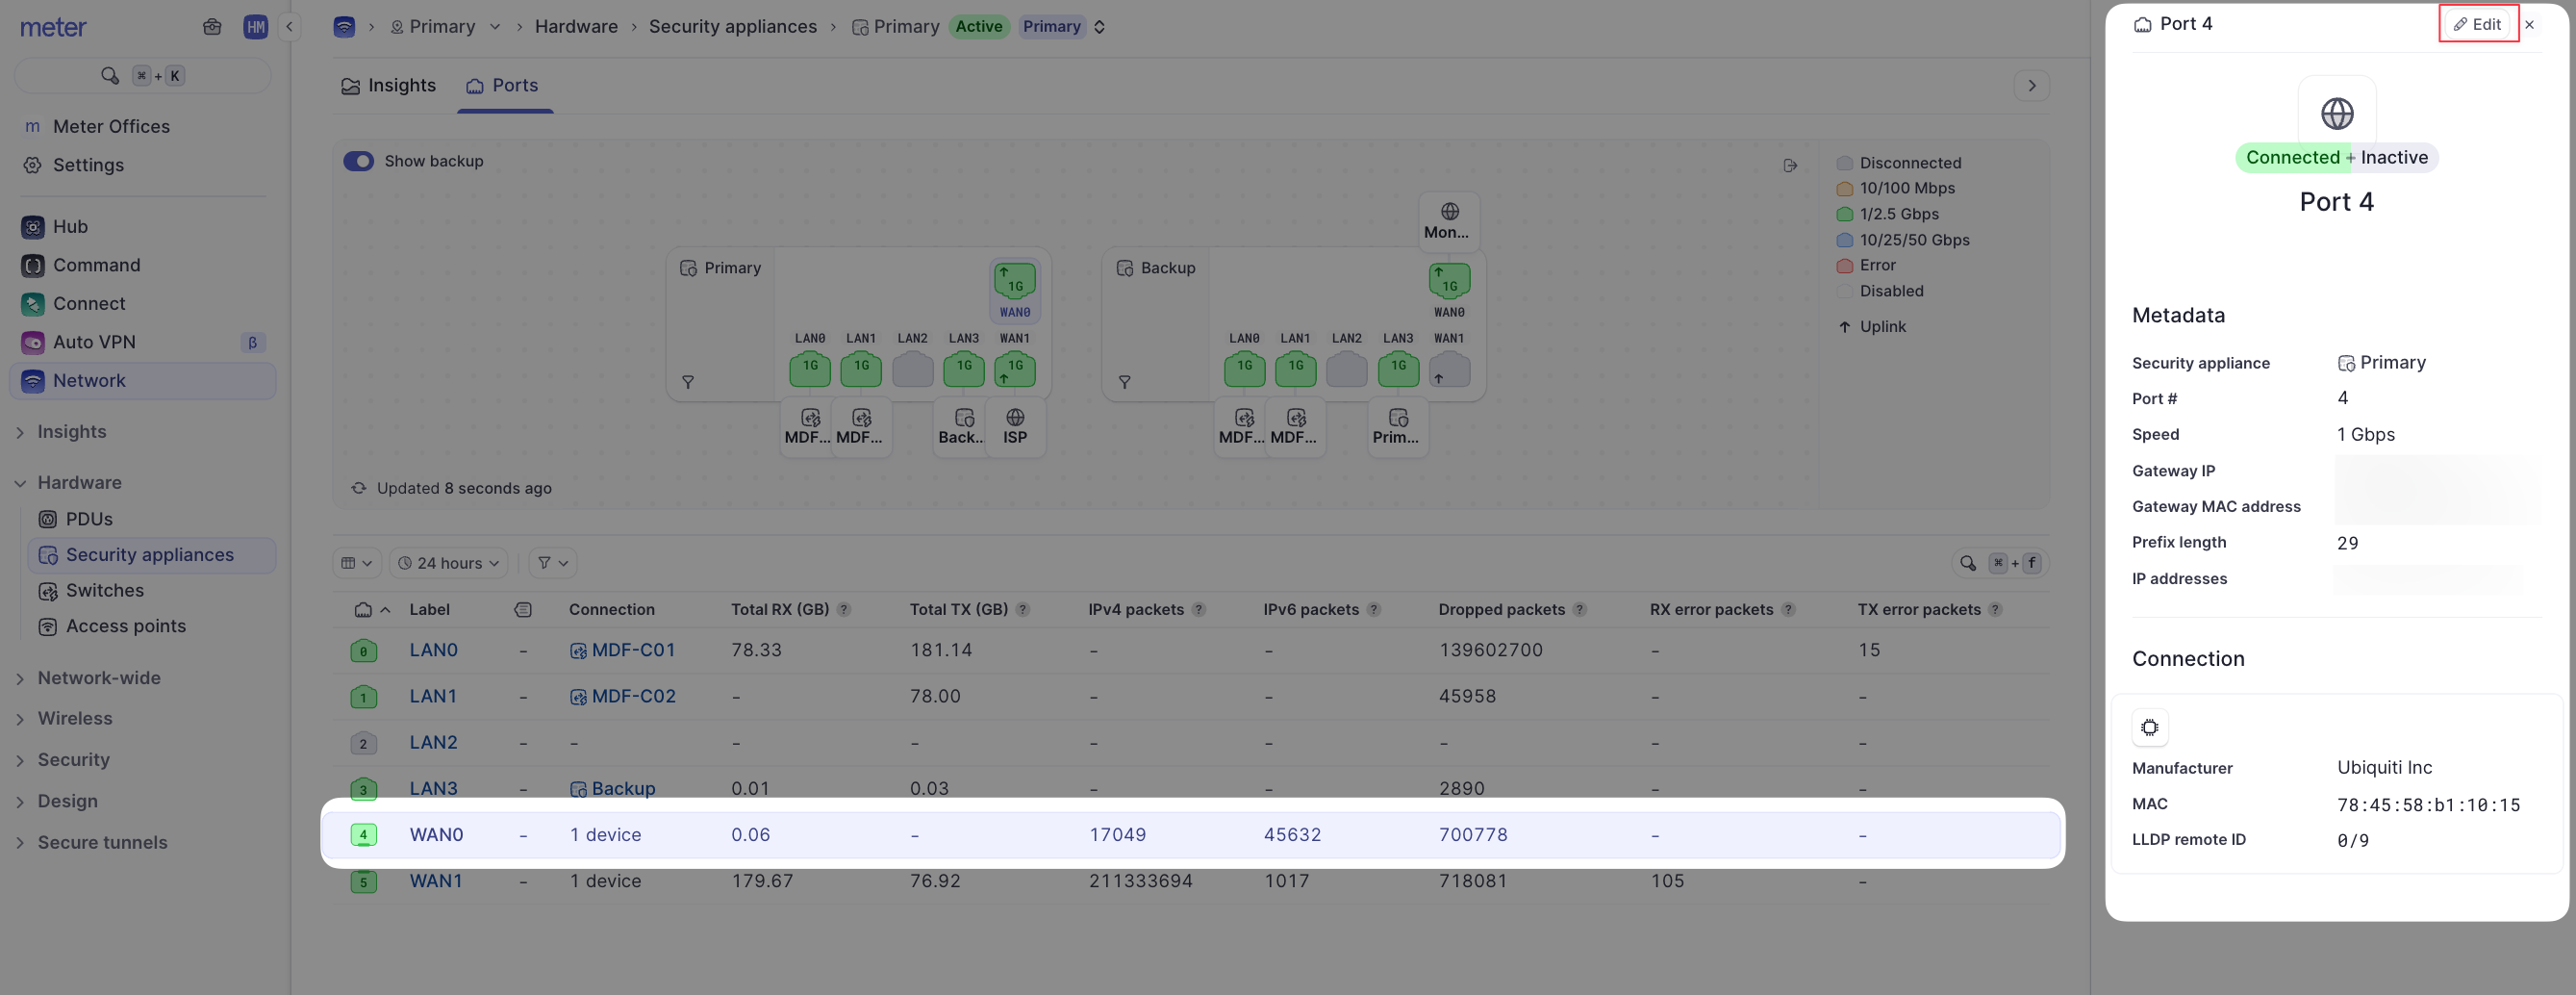
Port settings
| Setting | Description |
|---|---|
| Label | This will be used instead of the port number on the table |
| Description | Add notes or further describe anything specific to the port |
| Speed | Link speed of the port. This should almost always remain on the Auto setting |
| Uplink (WAN) | If toggled ON, the port can be used as a WAN port. If toggled OFF, the port will function on the LAN |
| Uplink Priority | If the port is a WAN port, use this to set the priority when using multiple WAN uplinks. A lower priority will be favored by first-active WAN failover |
| IP Configuration | If a WAN port, select how the port should obtain an IP address (DHCP or static). If static, fill in the IP info in the fields that appear. WAN ports may have more than one IP address. The first IP listed will be used by the Meter Firewall. Secondary IPs can be used for 1:1 NAT assignments if required |
| VLAN ID | Enter a VLAN ID if required by your ISP. If not, this should be left blank |
Need help?
If you run into any issues or have questions, please reach out to our Support Engineering team by opening a ticket via the Dashboard: https://dashboard.meter.com/support
Last updated by Meter Support Engineering on 01/23/2026