Who can Modify this Feature?
- Partner
- Meter Support
What are Radio Profiles?
Radio profiles are a default set of configurations that will be applied to an Access Point. Each access point can have one profile applied to it. The profile decides if radios are enabled or disabled. It also decides channel widths and channel selections. To read more about channels and channel widths see “What are Wi-Fi channels and Widths?”.
Add / Modify Profiles
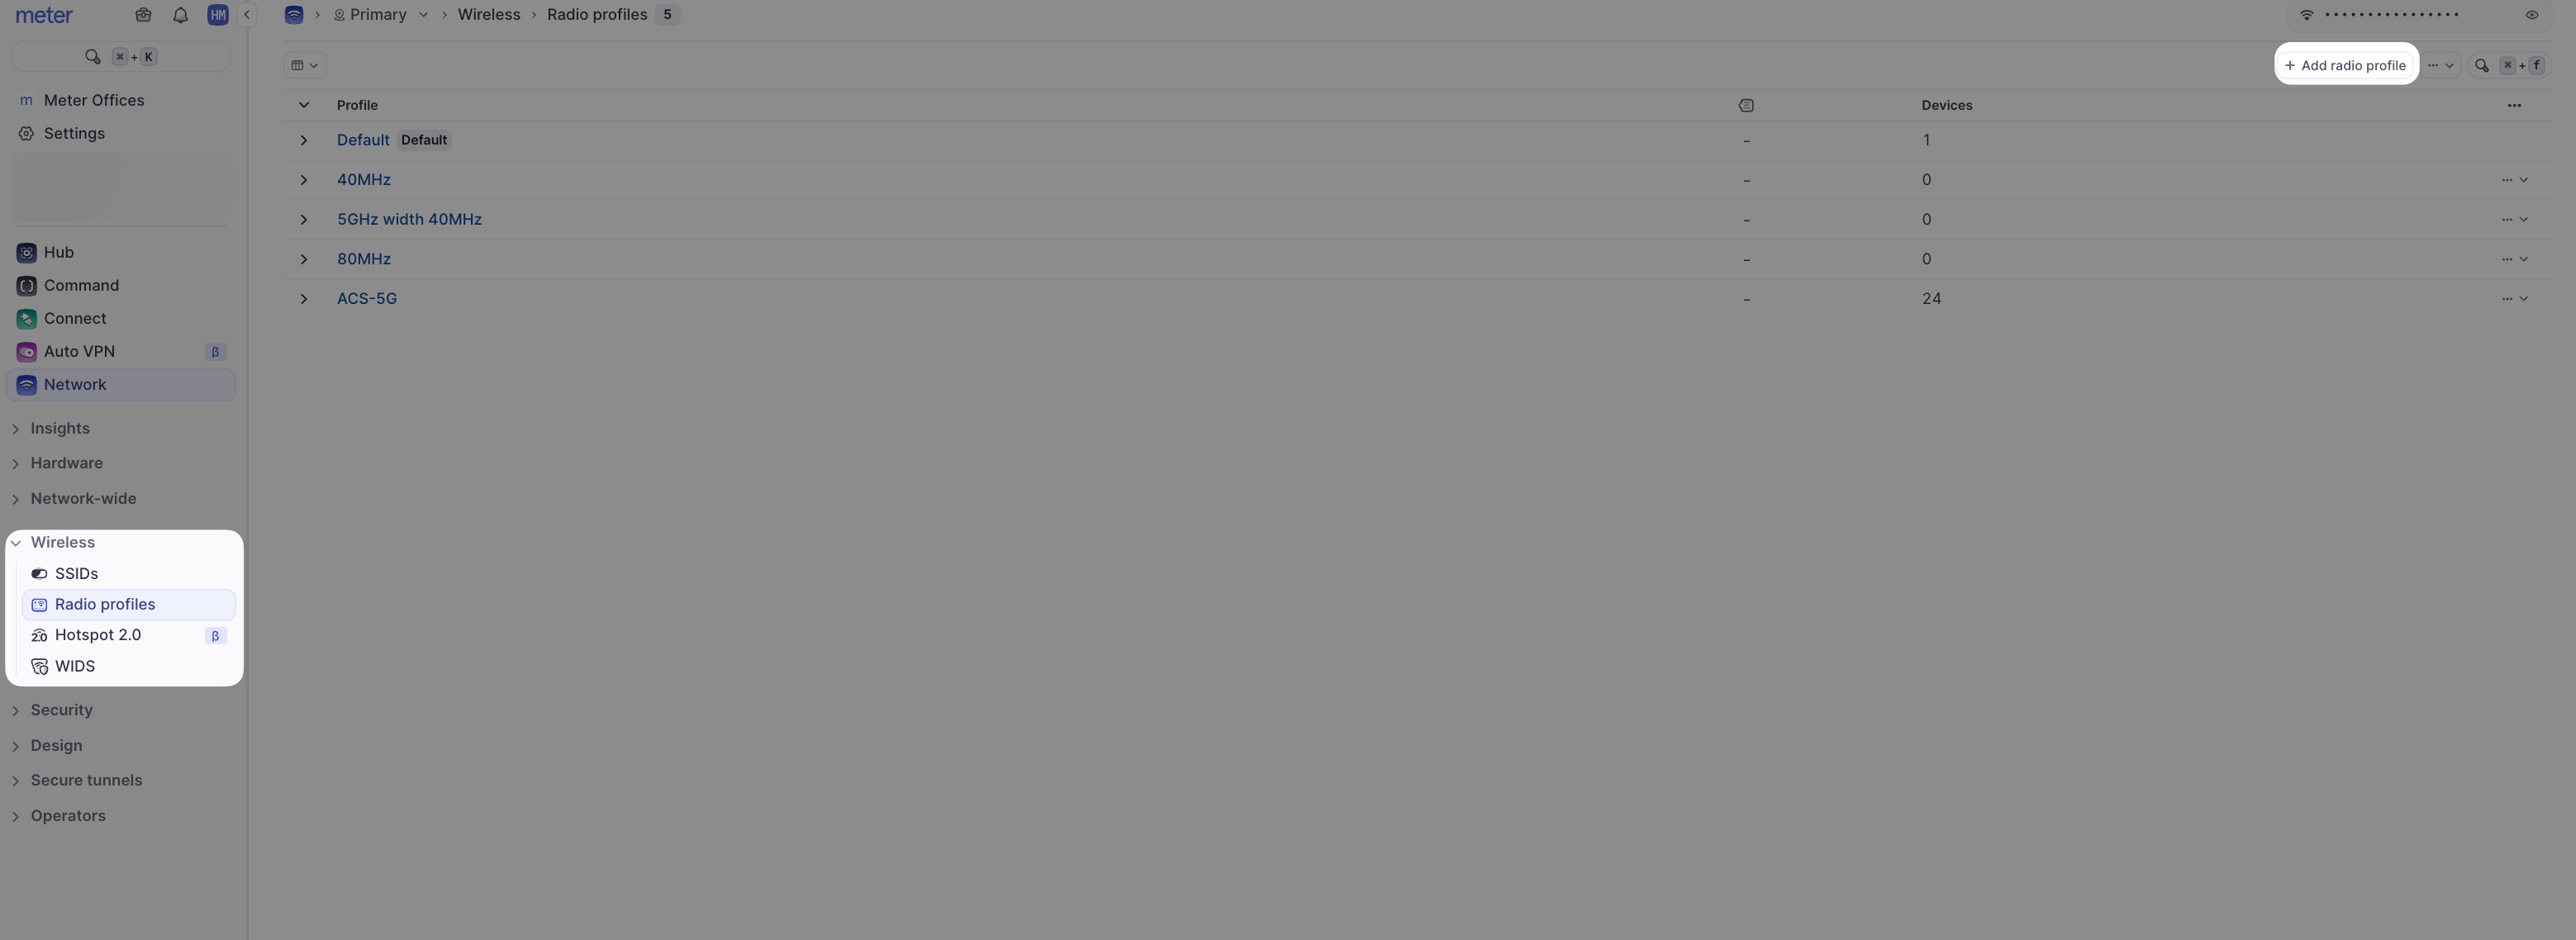
Radio profiles can be managed by logging into dashboard.meter.com and clicking on Wireless > Radio profiles.
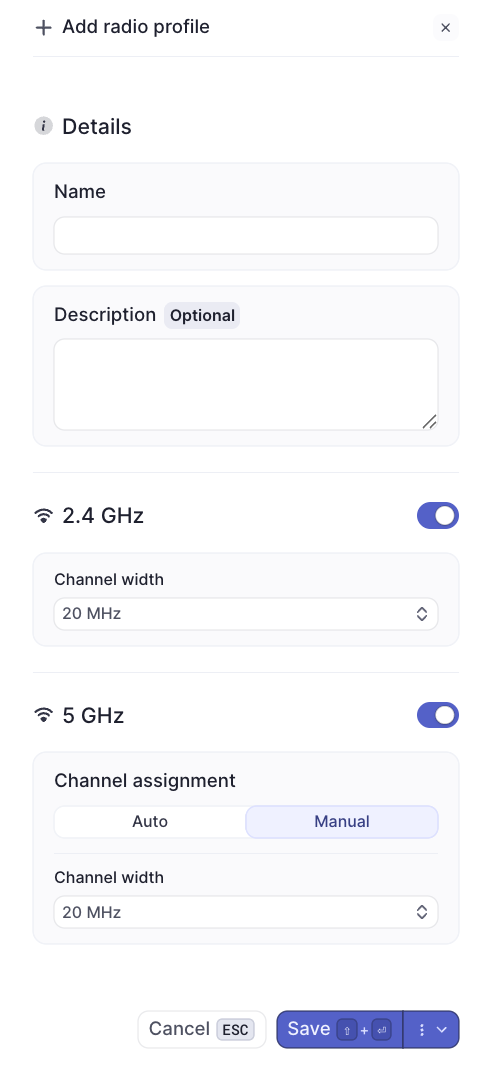
To add a profile, click on “Add radio profile” to reveal the configuration panel.
-
Name - The name of the radio profile.
-
2.4 Ghz - Disable or enable 2.4 GHz for the radio profile.
-
5 GHz - Disable or enable 5 GHz for the radio profile. For 5Ghz a channel width and channel assignment mode can be selected.
-
Channel Assignment - Pick Auto to use the Automatic Channel Selection on the Access Points page. Use the Manual to manually select channels for each access point.
-
Channel Width - In most cases using 20Mhz is recommended unless there are a small amount of access points (less than 10) and only a small amount of outside interference.
After adding the profile, it will populate in the list. Click on the name of the profile to make edits, or delete it using the Actions menu.
Best Practices
Here are some recommendations to optimize your Wireless Radio Profiles:
Choose Channel Width Wisely:
- 20 MHz: Ideal for high-density areas (e.g., office buildings) where interference is a concern.
- 40/80 MHz: Best for open spaces or environments with few competing networks.
Manage Transmit Power:
- Avoid setting transmit power too high, as this can cause overlapping signals and increased interference.
- This can be adjusted for each Access Point under Hardware > Access Points
Set Appropriate Data Rates:
- Raising the minimum data rate reduces airtime usage from slower devices, but be cautious not to exclude older devices unnecessarily.
Test Changes Gradually:
- Roll out changes to a small subset of APs first, then monitor performance before applying network-wide.
If you have any questions about the Radio Profiles or need further assistance, feel free to contact Meter Support at support@meter.com or submit a ticket at meter.com/support.