Overview
This guide walks you through configuring AutoVPN to connect multiple Meter networks using a hub-and-spoke topology. You'll learn how to set up both single and multiple spoke configurations with complete examples.
Prerequisites
Before configuring AutoVPN, ensure:
- You have Partner or Admin access with write permissions
- The hub network has a stable public IP address
- All networks are running a supported NOS version
- You have planned your IP addressing to avoid subnet conflicts
Prepare VLANs for AutoVPN
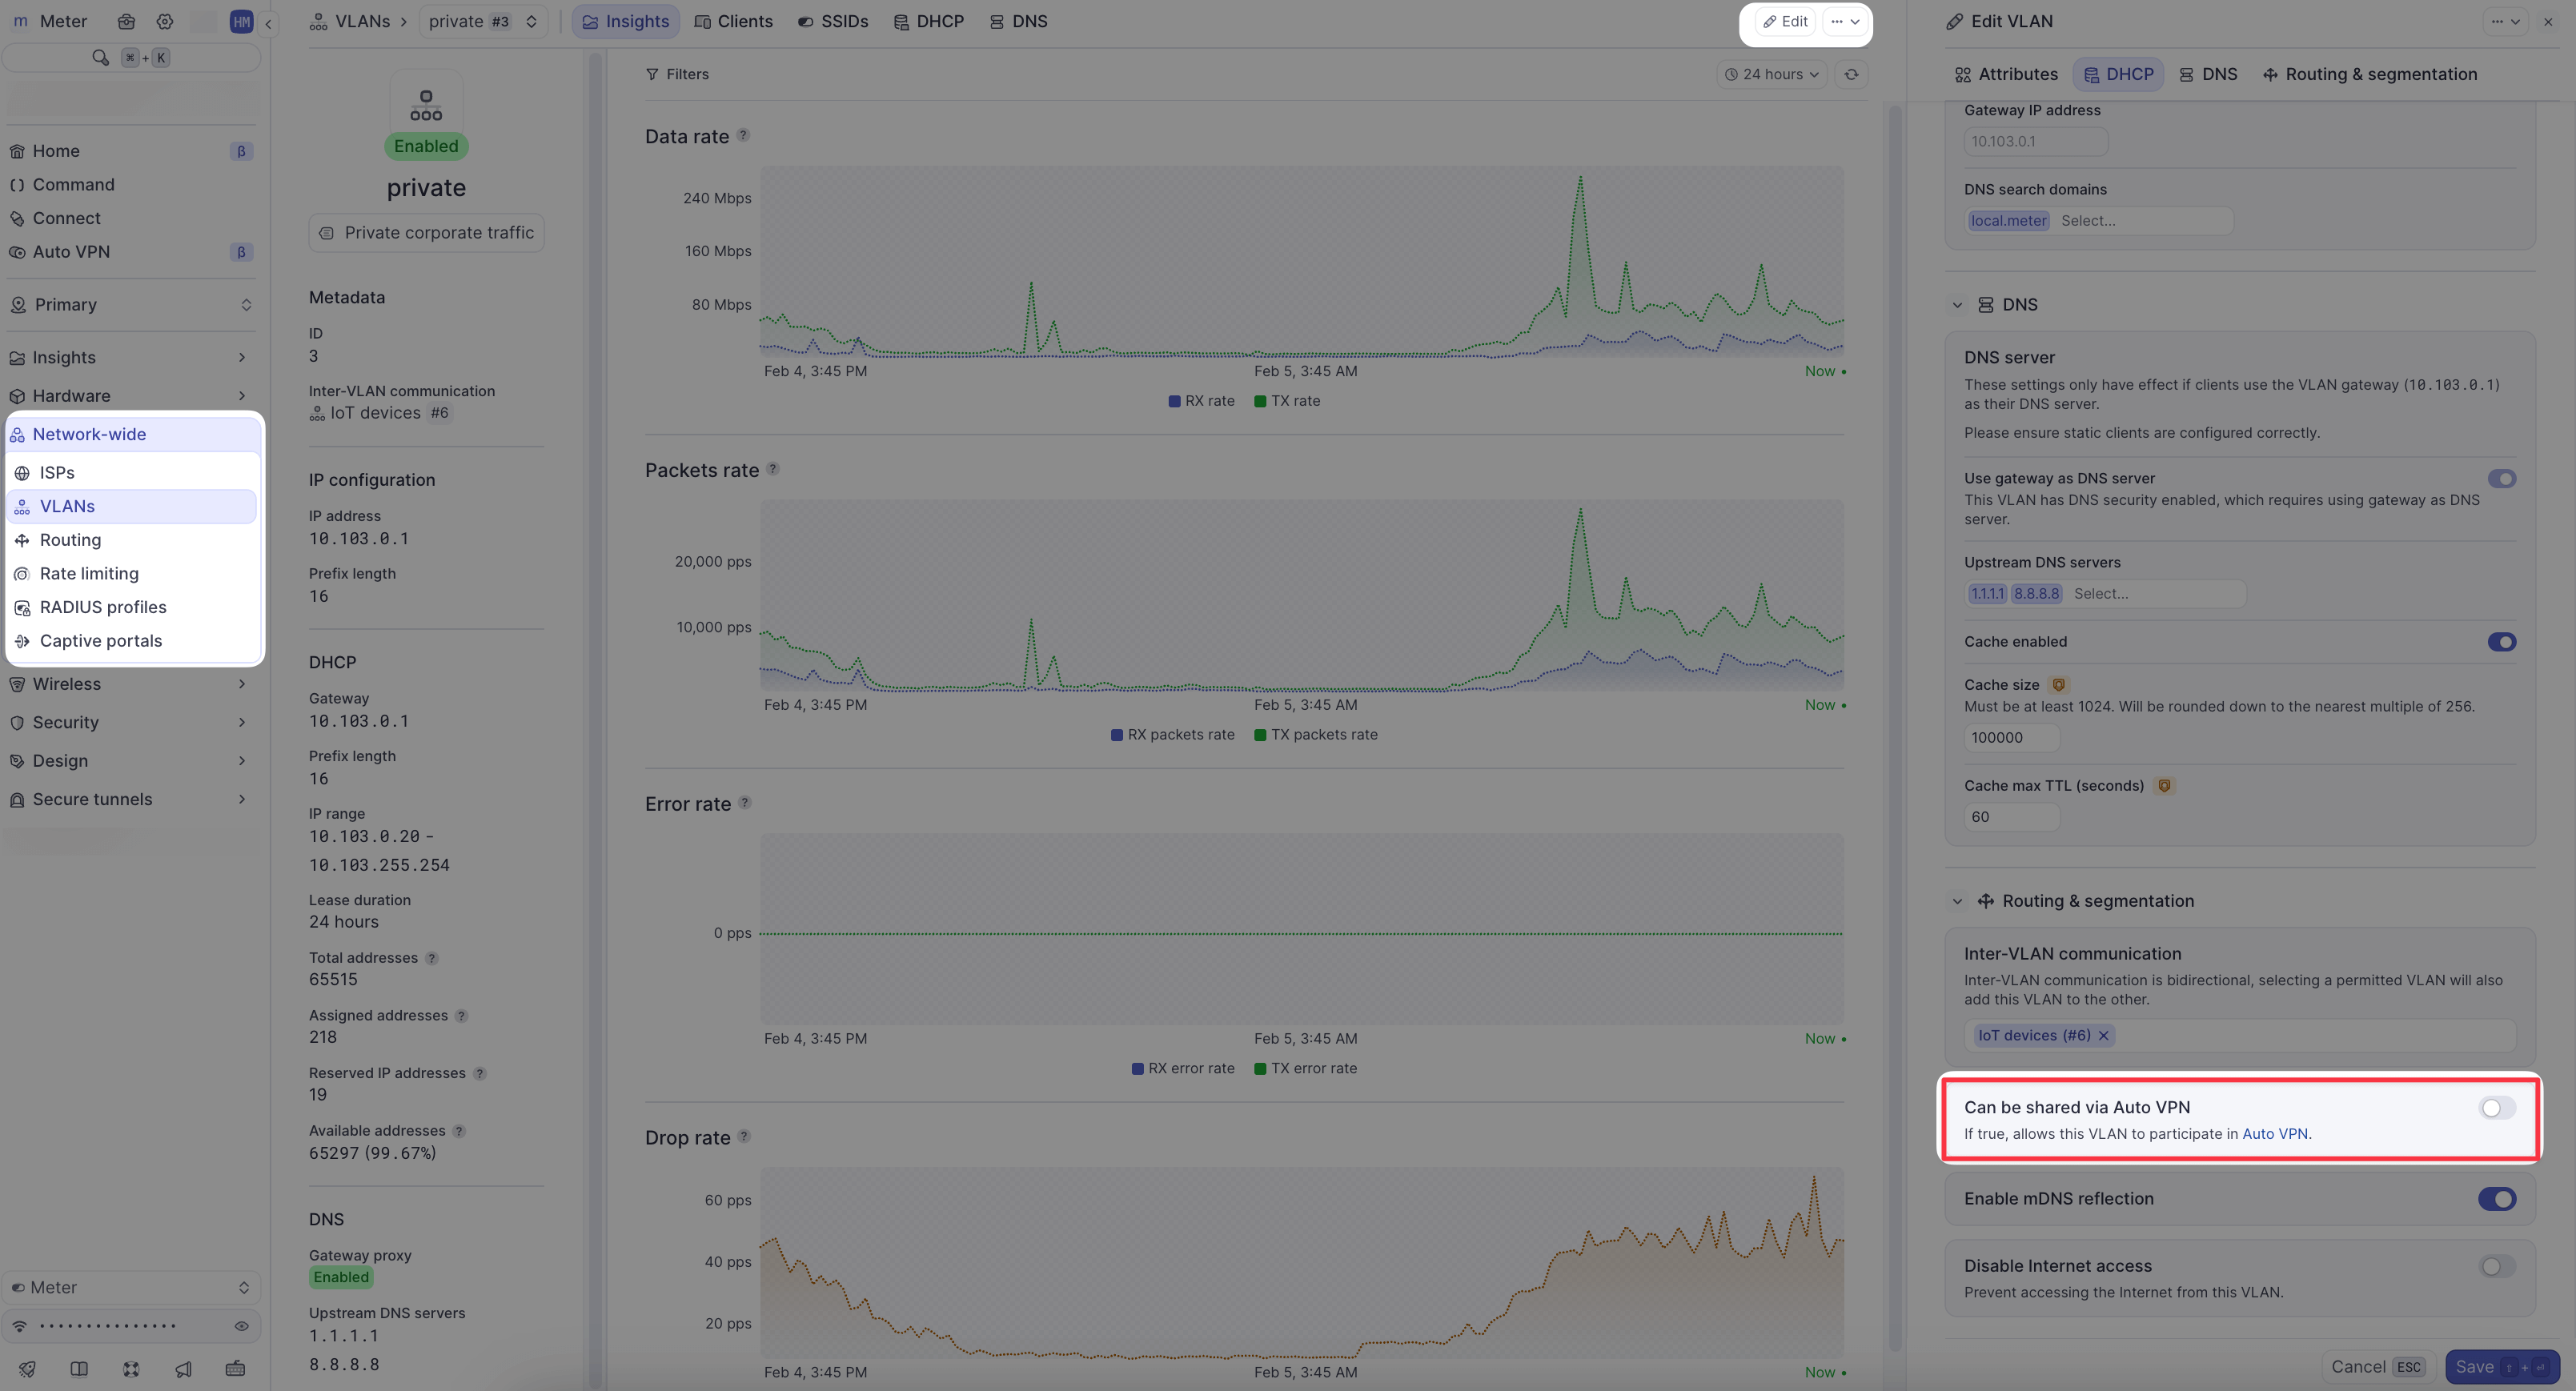
VLANs must be explicitly marked as shareable before they can participate in AutoVPN.
Enable VLAN sharing
- Navigate to Network-wide > VLANs
- Click on the VLAN you want to share
- Click Edit
- Toggle Can be shared via AutoVPN to ON
- Click Save
Repeat this process for each VLAN that should be accessible over AutoVPN on each network.
Example 1: Single spoke configuration
This example demonstrates connecting one branch office (spoke) to a central office (hub).
Scenario
- Hub: Main office in San Francisco
- Public IP:
203.0.113.10 - Shareable VLANs:
10.1.0.0/24(Corporate),10.1.10.0/24(Servers)
- Public IP:
- Member: Branch office in Austin
- Shareable VLANs:
10.2.0.0/24(Corporate)
- Shareable VLANs:
Configuration steps
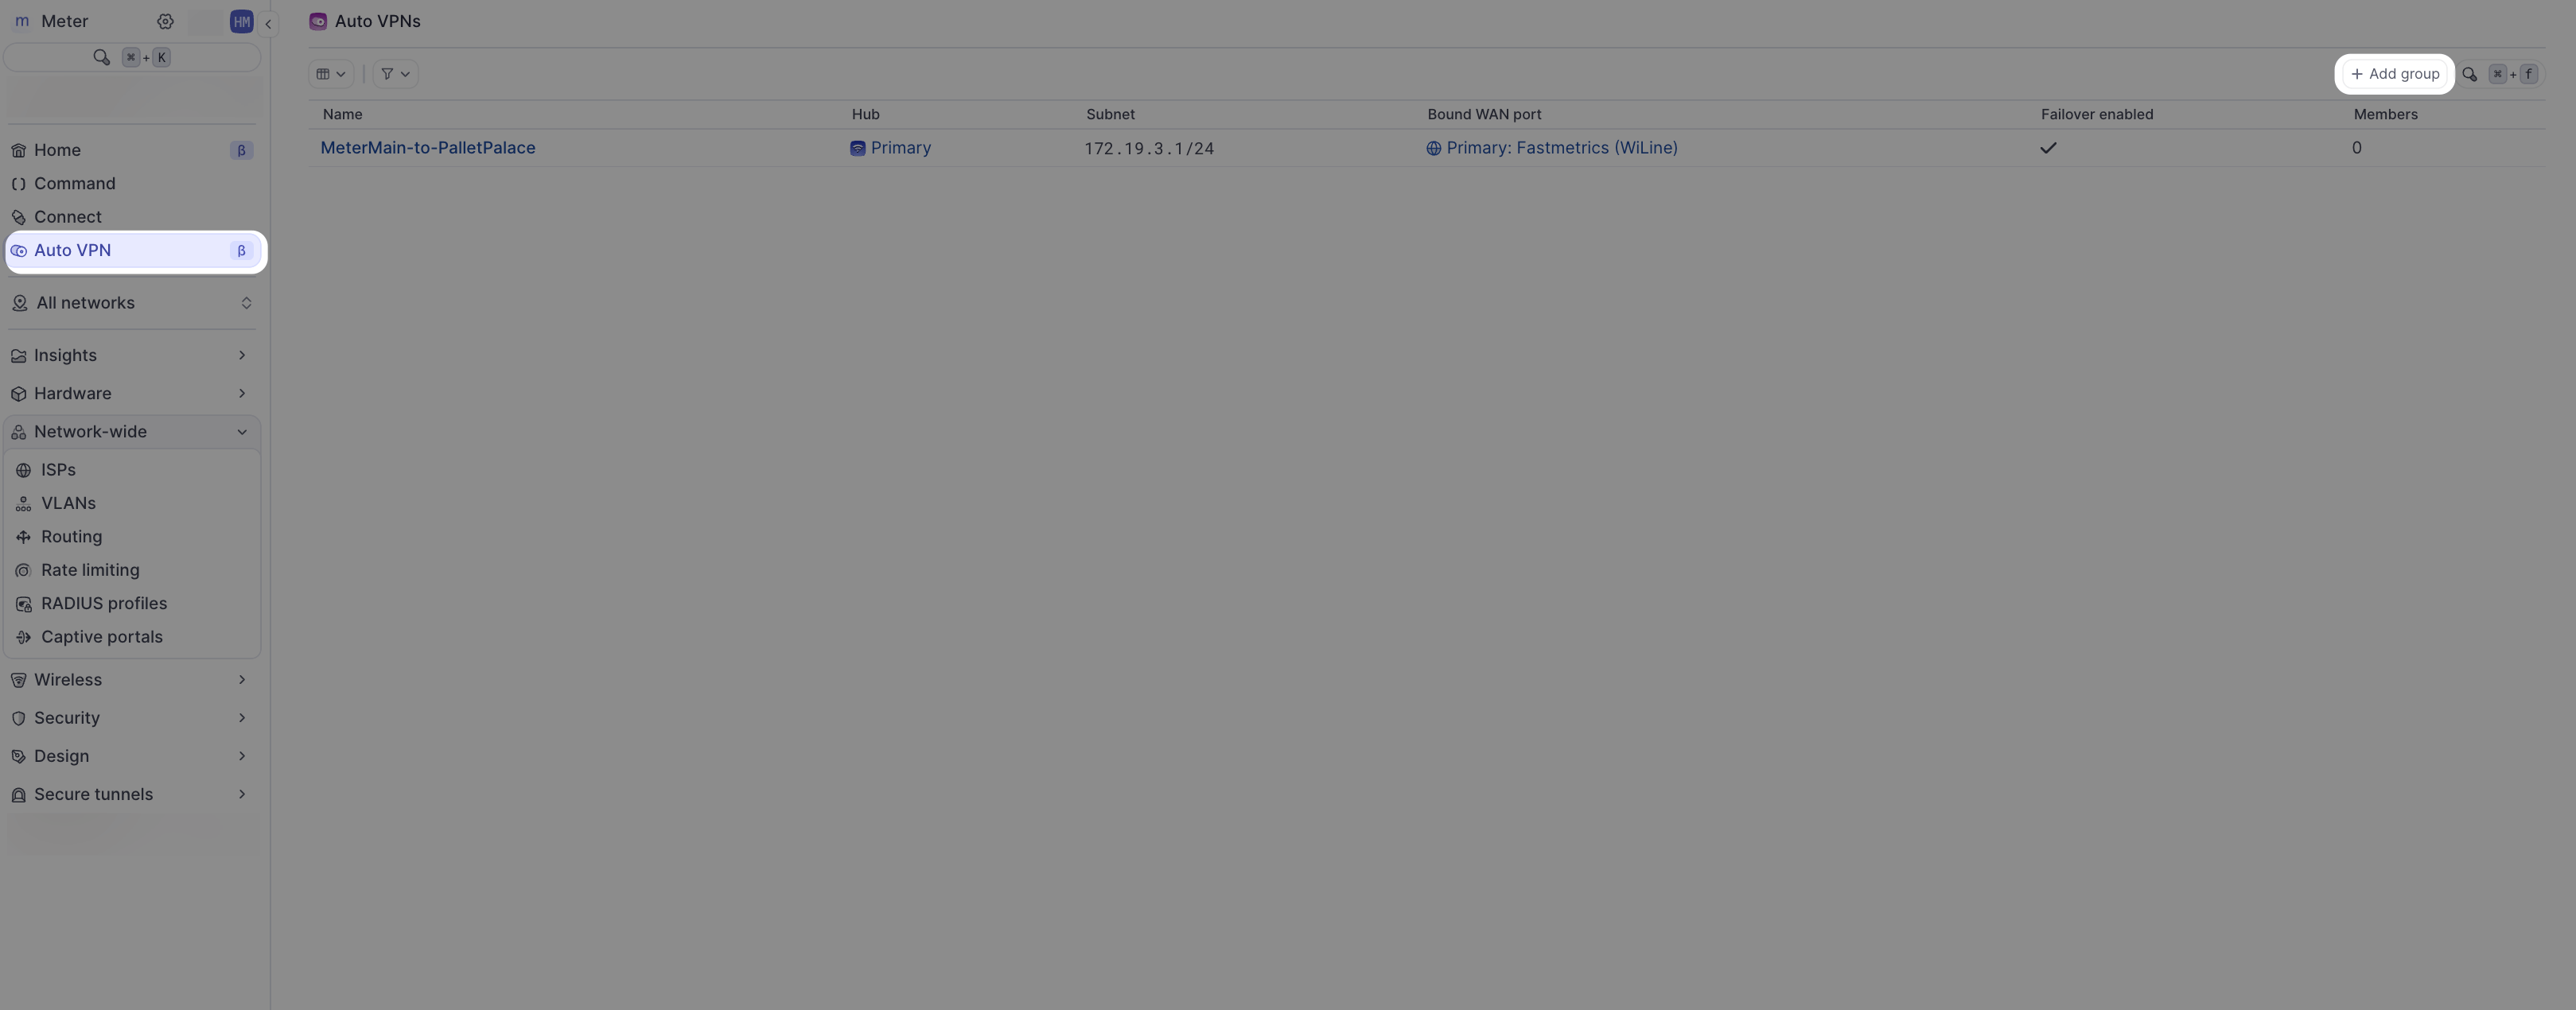
- Navigate to AutoVPN in the Dashboard
- Click Add group
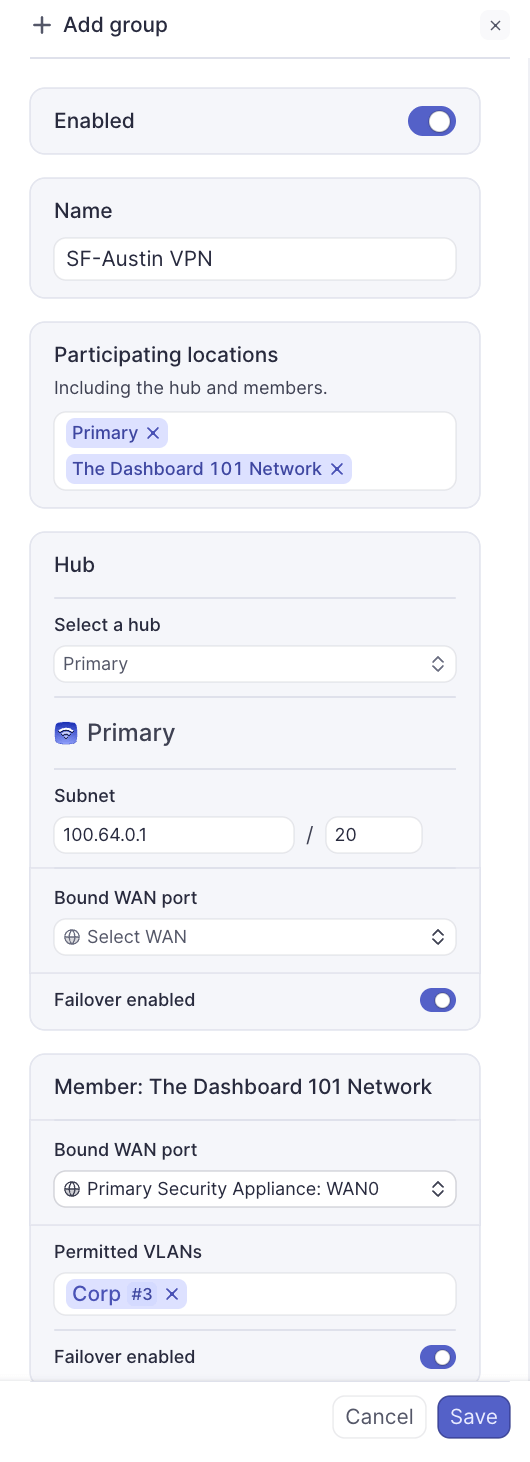
- Configure the group:
- Name:
SF-Austin VPN - Member locations: Select both the San Francisco and Austin networks
- Name:
- Configure the Hub (San Francisco):
- Hub: Select the San Francisco network
- Subnet: Leave default (100.64.0.0/20) or customize if needed
- Bound WAN port: Select the WAN port with the public IP
- Failover Enabled: Toggle ON if you have redundant WAN connections
- Configure the Member (Austin):
- Permitted VLANs: Select
10.2.0.0/24(Corporate)
- Permitted VLANs: Select
- Click Save
Verify the connection
- Navigate to AutoVPN in the Dashboard
- Click on the group name (
SF-Austin VPN)
- Click on the member (Austin) to view handshake information
- Verify both RX and TX handshakes are shown with packet information
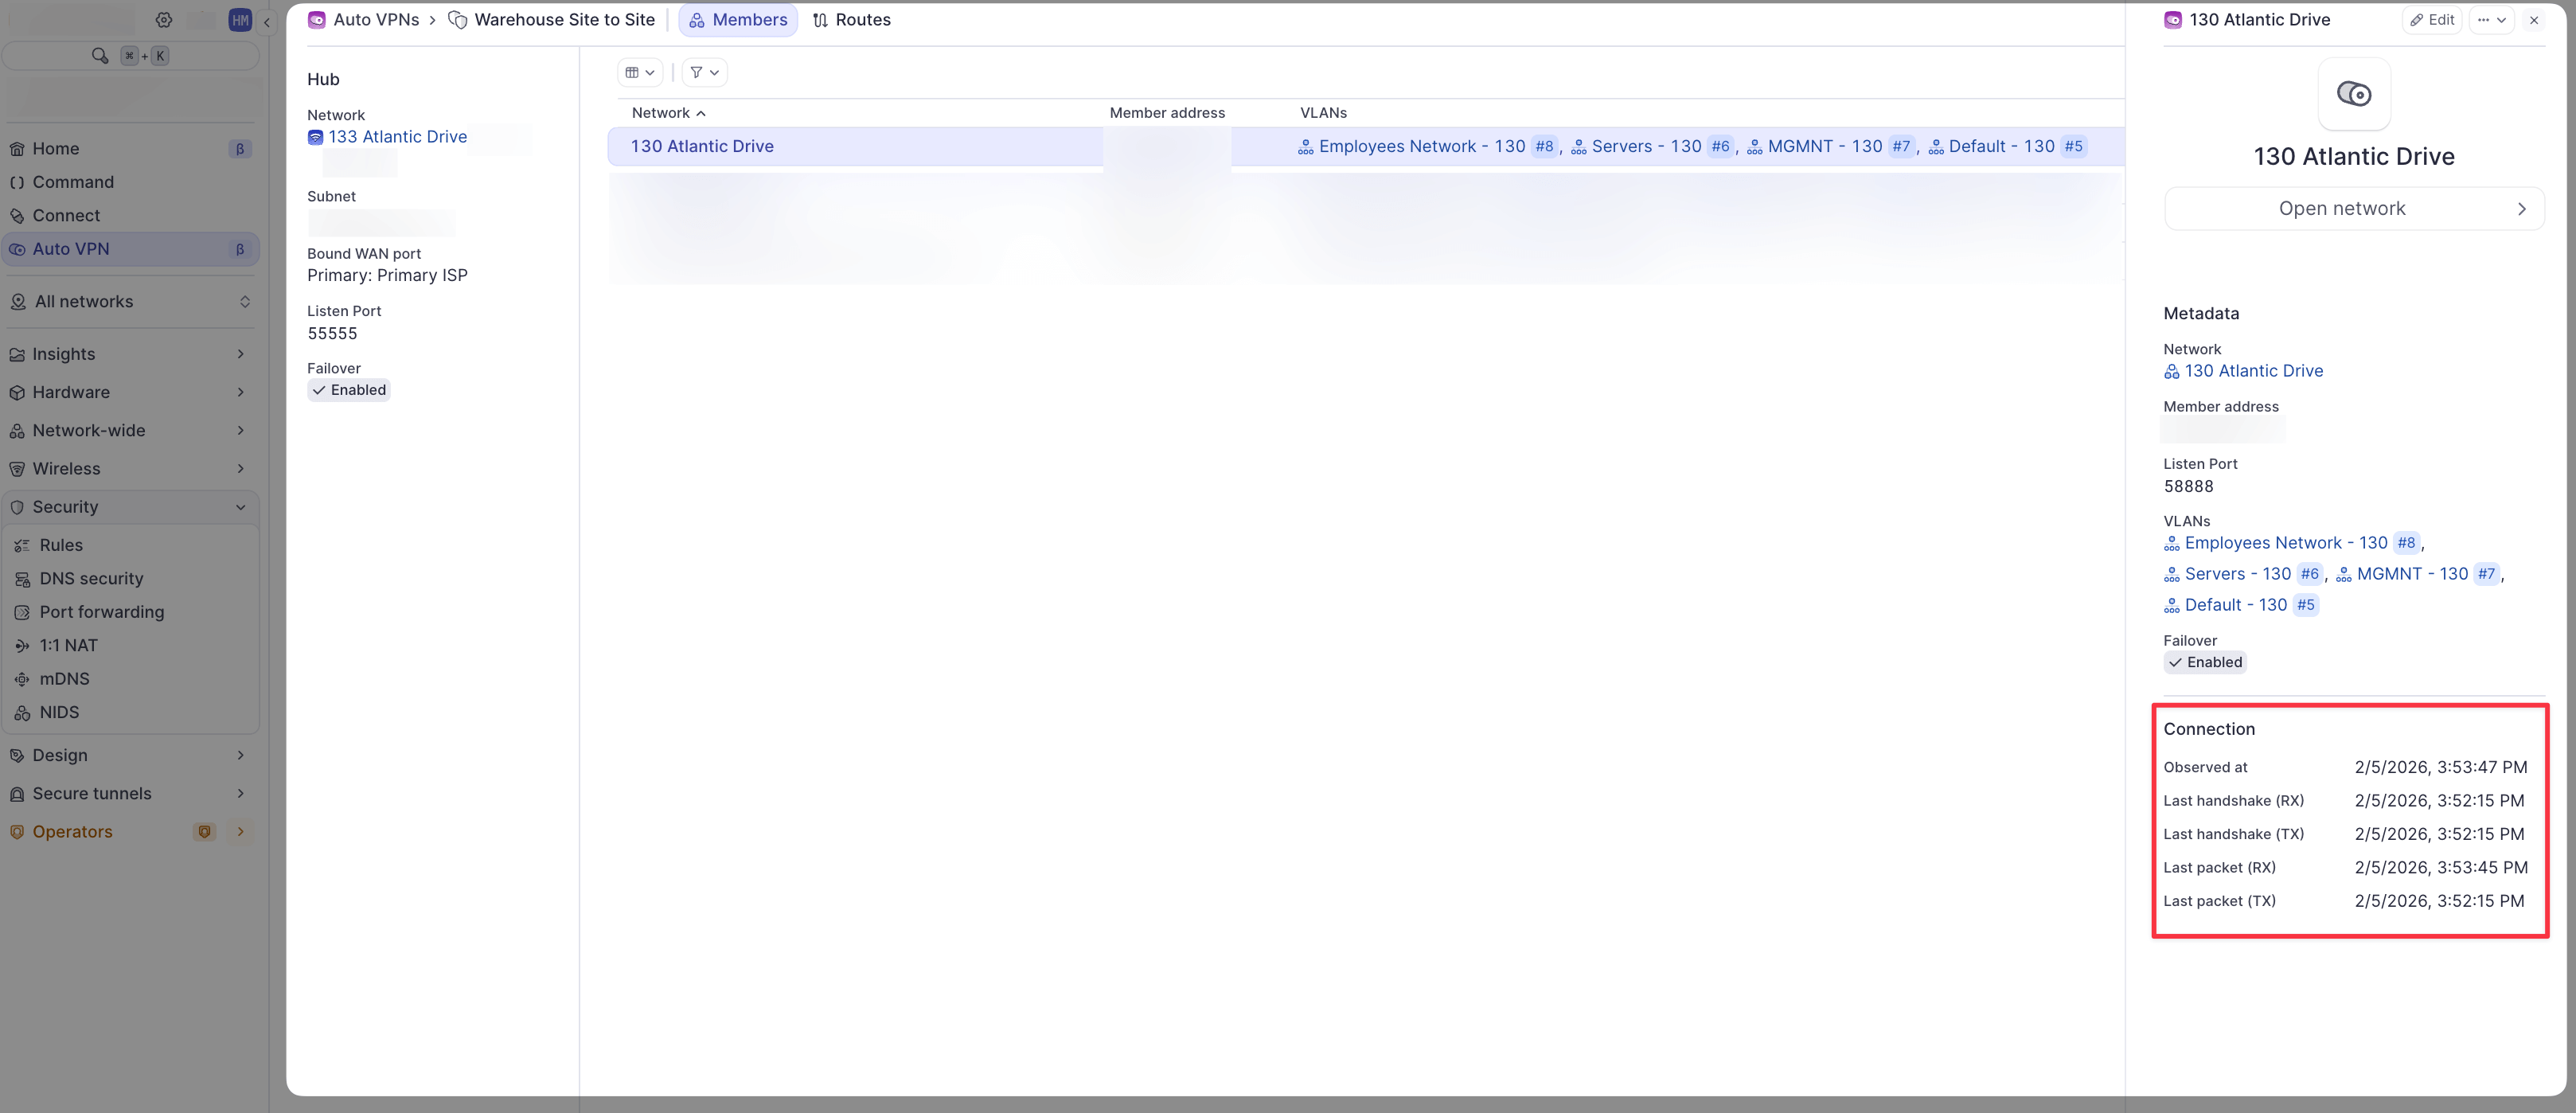
If the tunnel shows handshakes and packet data on both sides, it is established successfully.
Configure firewall rules
AutoVPN does not automatically create firewall rules. You must configure rules to allow traffic:
On Austin (Member):
- Navigate to Network-wide > VLANs
- Select
10.2.0.0/24(Corporate) - Go to Firewall Rules
- Add rules to allow traffic to hub subnets:
- Allow
10.2.0.0/24→10.1.0.0/24 - Allow
10.2.0.0/24→10.1.10.0/24
- Allow
On San Francisco (Hub):
- Navigate to Network-wide > VLANs
- Select
10.1.0.0/24(Corporate) - Go to Firewall Rules
- Add rule to allow traffic from member:
- Allow
10.1.0.0/24→10.2.0.0/24
- Allow
Repeat for the Servers VLAN if needed.
Test connectivity
From a device on the Austin Corporate VLAN (10.2.0.0/24), test connectivity:
ping 10.1.0.1 # Hub gateway or resourceIf the ping succeeds, AutoVPN is working correctly.
Example 2: Multiple spoke configuration
This example demonstrates connecting multiple branch offices to a central hub.
Scenario
- Hub: Data center in Chicago
- Public IP:
198.51.100.50 - Shareable VLANs:
10.0.0.0/24(Management),10.0.10.0/24(Databases),10.0.20.0/24(File Storage)
- Public IP:
- Member 1: Retail store in Boston
- Shareable VLANs:
10.10.0.0/24(Store Network),10.10.5.0/24(POS Systems)
- Shareable VLANs:
- Member 2: Retail store in Seattle
- Shareable VLANs:
10.20.0.0/24(Store Network),10.20.5.0/24(POS Systems)
- Shareable VLANs:
- Member 3: Retail store in Miami
- Shareable VLANs:
10.30.0.0/24(Store Network),10.30.5.0/24(POS Systems)
- Shareable VLANs:
Note: Each site has unique, non-overlapping subnets.
Configuration steps
- Navigate to AutoVPN in the Dashboard
- Click Add group
- Configure the group:
- Name:
Retail Stores - Hub and Spoke - Member locations: Select Chicago (hub) and all three retail locations (Boston, Seattle, Miami)
- Name:
- Configure the Hub (Chicago):
- Hub: Select the Chicago network
- Subnet: Leave default (100.64.0.0/20)
- Bound WAN port: Select the WAN port with the public IP
- Failover Enabled: Toggle ON for redundancy
- Configure Member 1 (Boston):
- Permitted VLANs: Select both:
10.10.0.0/24(Store Network)10.10.5.0/24(POS Systems)
- Permitted VLANs: Select both:
- Configure Member 2 (Seattle):
- Permitted VLANs: Select both:
10.20.0.0/24(Store Network)10.20.5.0/24(POS Systems)
- Permitted VLANs: Select both:
- Configure Member 3 (Miami):
- Permitted VLANs: Select both:
10.30.0.0/24(Store Network)10.30.5.0/24(POS Systems)
- Permitted VLANs: Select both:
- Click Save
Verify all connections
- Navigate to AutoVPN in the Dashboard
- Click on the group name
- Verify each member shows as connected with active handshakes
You should see three established tunnels (one for each retail store to the hub).
Configure firewall rules
On each retail store (Members):
Allow store networks to access hub resources:
- Navigate to Network-wide > VLANs
- For each permitted VLAN, add firewall rules to allow access to hub VLANs:
- Allow local subnet →
10.0.10.0/24(Databases) - Allow local subnet →
10.0.20.0/24(File Storage)
- Allow local subnet →
On Chicago (Hub):
Allow hub resources to reach stores if needed:
- Navigate to Network-wide > VLANs
- For the Databases VLAN (
10.0.10.0/24), add rules to allow POS traffic:- Allow
10.0.10.0/24→10.10.5.0/24 - Allow
10.0.10.0/24→10.20.5.0/24 - Allow
10.0.10.0/24→10.30.5.0/24
- Allow
Store-to-store communication
If Boston needs to communicate with Seattle, traffic will flow:
Boston → Hub (Chicago) → Seattle
This requires:
- Boston has a firewall rule allowing traffic to Seattle's subnet
- Hub has routing configured (automatically handled by AutoVPN)
- Seattle has a firewall rule allowing traffic from Boston's subnet
The hub facilitates all inter-member communication.
Test connectivity
From a device on Boston's Store Network (10.10.0.0/24):
# Test hub access
ping 10.0.10.1  # Database server in Chicago

# Test store-to-store (via hub)
ping 10.20.0.1  # Device in Seattle
Monitoring and troubleshooting
Check tunnel status
Navigate to AutoVPN and select your group. For each member:
- Established tunnel: Shows both RX and TX handshakes with packet counts
- Tunnel down: Shows only one-way handshake or no packets
Common issues
Tunnel not establishing:
- Verify hub has a stable public IP
- Check that at least one VLAN is selected in "Permitted VLANs" for the member
- Ensure WAN firewall allows VPN traffic
No connectivity despite tunnel being up:
- Verify firewall rules are configured on both source and destination VLANs
- Check for overlapping IP addresses across sites
- Confirm VLANs are marked as shareable on both networks
Performance issues:
- Verify hub has sufficient bandwidth for aggregate traffic
- Check for network congestion on WAN links
- Consider hub hardware capacity for large deployments
Best practices
- Plan IP addressing carefully: Use non-overlapping subnets across all sites
- Start small: Test with one or two members before adding many sites
- Document your configuration: Keep records of which VLANs are shared and firewall rules
- Monitor tunnel health: Regularly check AutoVPN status in the Dashboard
- Use descriptive names: Name groups and networks clearly for easy identification
- Test failover: If using redundant WAN connections, test failover behavior
Related resources
- AutoVPN architecture and design - Understanding the routing and hub-spoke model
- IPSec site-to-site tunnels - Alternative VPN solution
- VLANs - Configuring VLANs for your network
- Firewall ACLs - Managing firewall rules
Need help?
If you run into any issues or have questions, please reach out to our Support Engineering team by opening a ticket via the Dashboard: https://dashboard.meter.com/support
Last updated by Meter Support Engineering on 01/23/2026