Configuration for Meter devices
Who can modify this feature?
- Partner
- Company/Network Admins with write access
- Meter Support
Overview
This guide walks you through configuring your switch ports in the Meter Dashboard when patching in Meter devices.
Steps to configure switch ports
-
Log in to the Meter Dashboard - Go to dashboard.meter.com and sign in to your account
-
Navigate to the Switch - In the left-hand menu, go to Hardware > Switches. Select the switch where you have patched in the Meter device
-
Select and Configure the Port
- On the switch page, click the port where the Meter device is connected
- Apply the following settings:
| Setting | Value |
|---|---|
| Enable Data | Toggle ON |
| Enable PoE | Toggle ON (Note: Fiber ports do not provide PoE, so you will not see this option on those ports) |
| Speed | Auto |
| Port Mode | Trunk (Selecting Trunk will automatically toggle Allowed VLANs: All to ON) |
| Native VLAN | mgmt #1 |
| Allowed VLANs: All | Toggle ON |
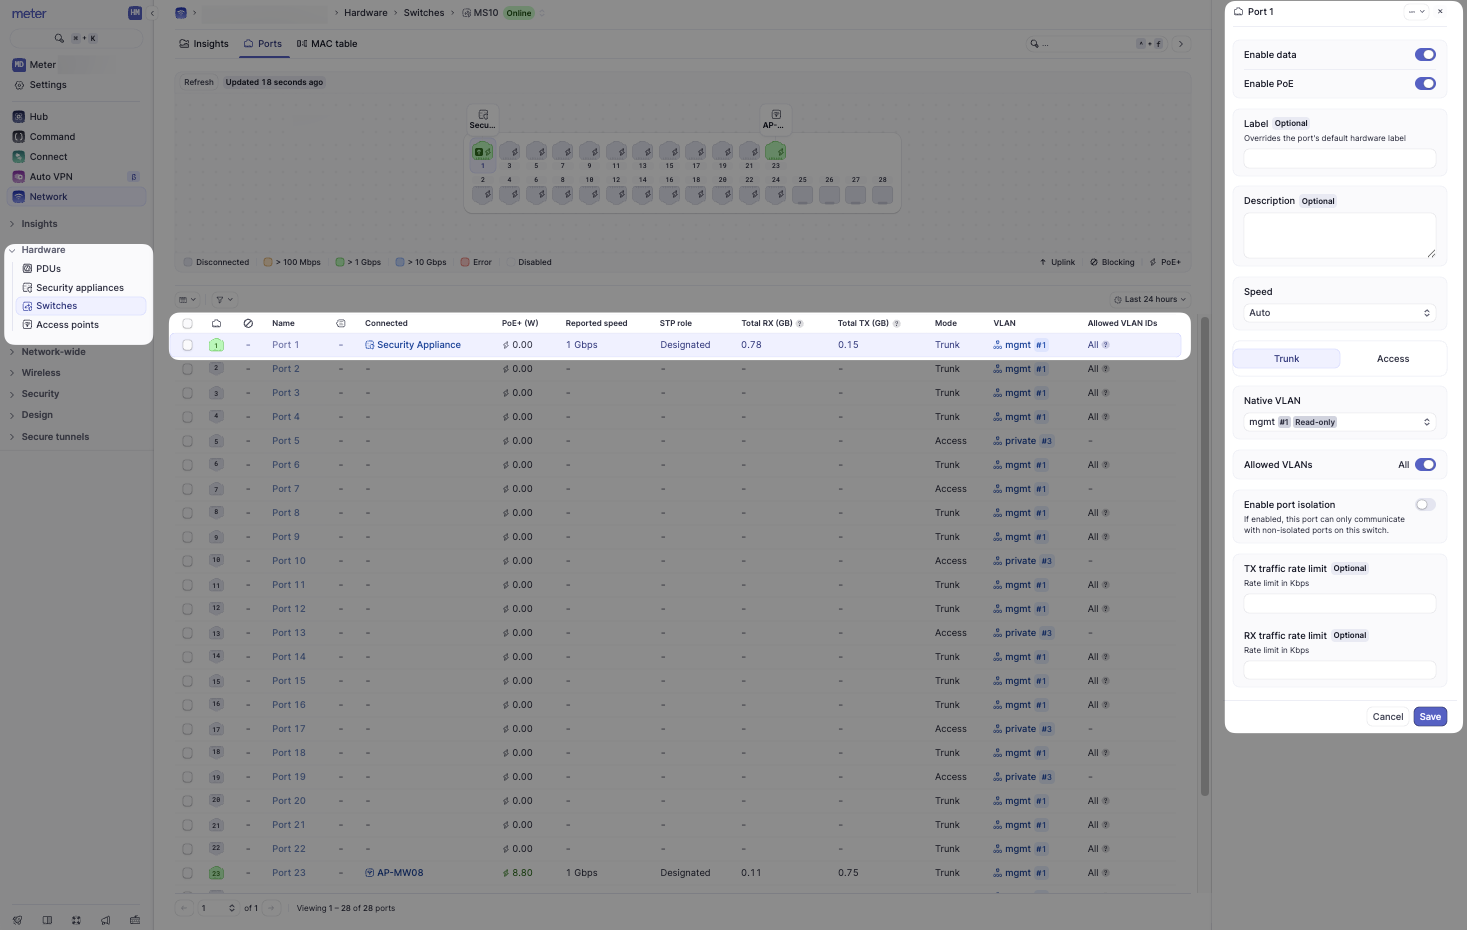
- Save the Configuration - Click Save to apply the changes
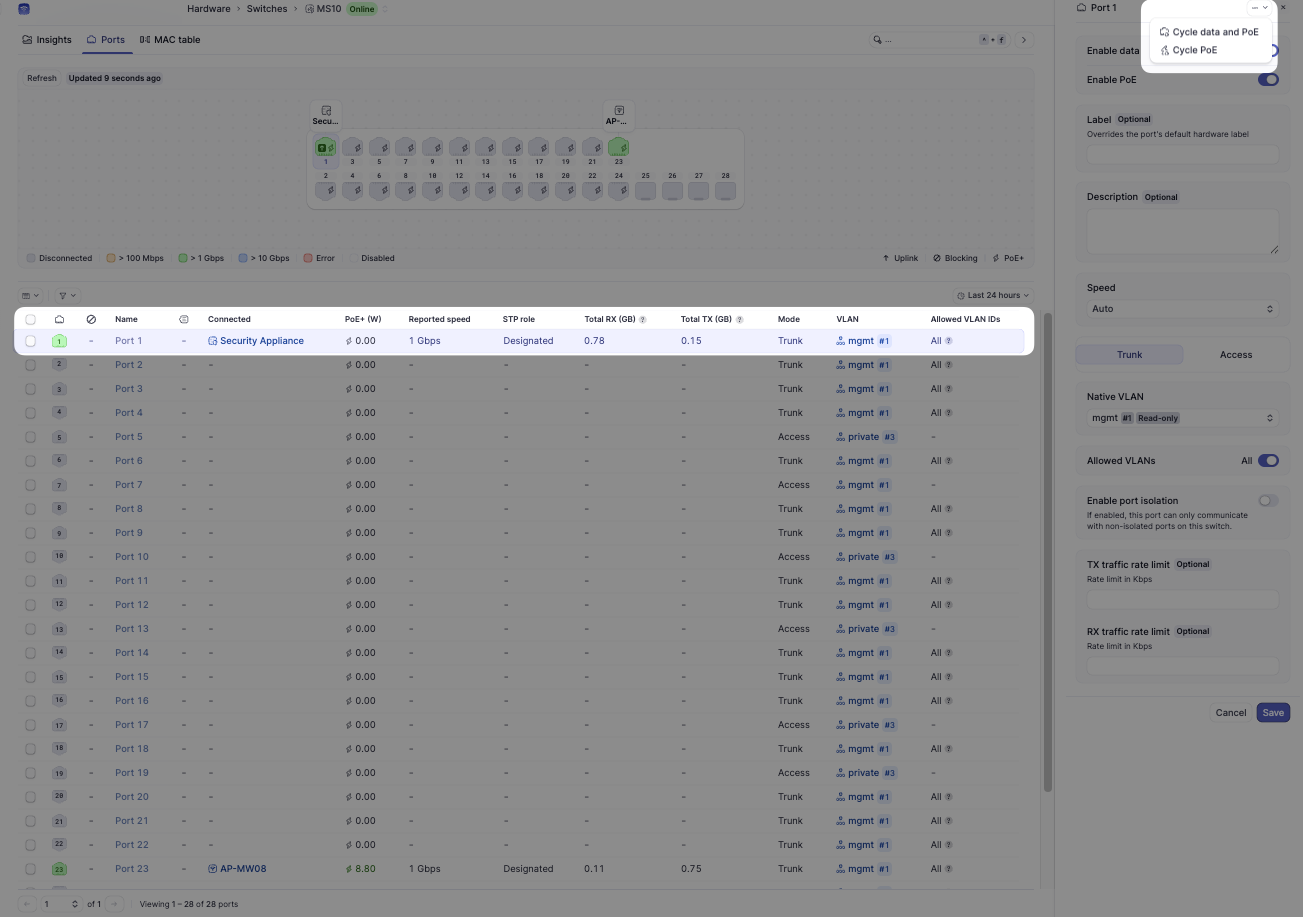
After configuration
Allow 5-10 minutes for the Meter device to fetch the updated configuration and report online.
If the device does not come online:
- Use the Action Menu for the port
- Select Cycle Data and PoE to reset the connection
Need help?
If you run into any issues or have questions, please reach out to our Support Engineering team by opening a ticket via the Dashboard: https://dashboard.meter.com/support
Last updated by Meter Support Engineering on 01/23/2026